Simple Washi Tape Painting: Easy Geometric Art Tutorial
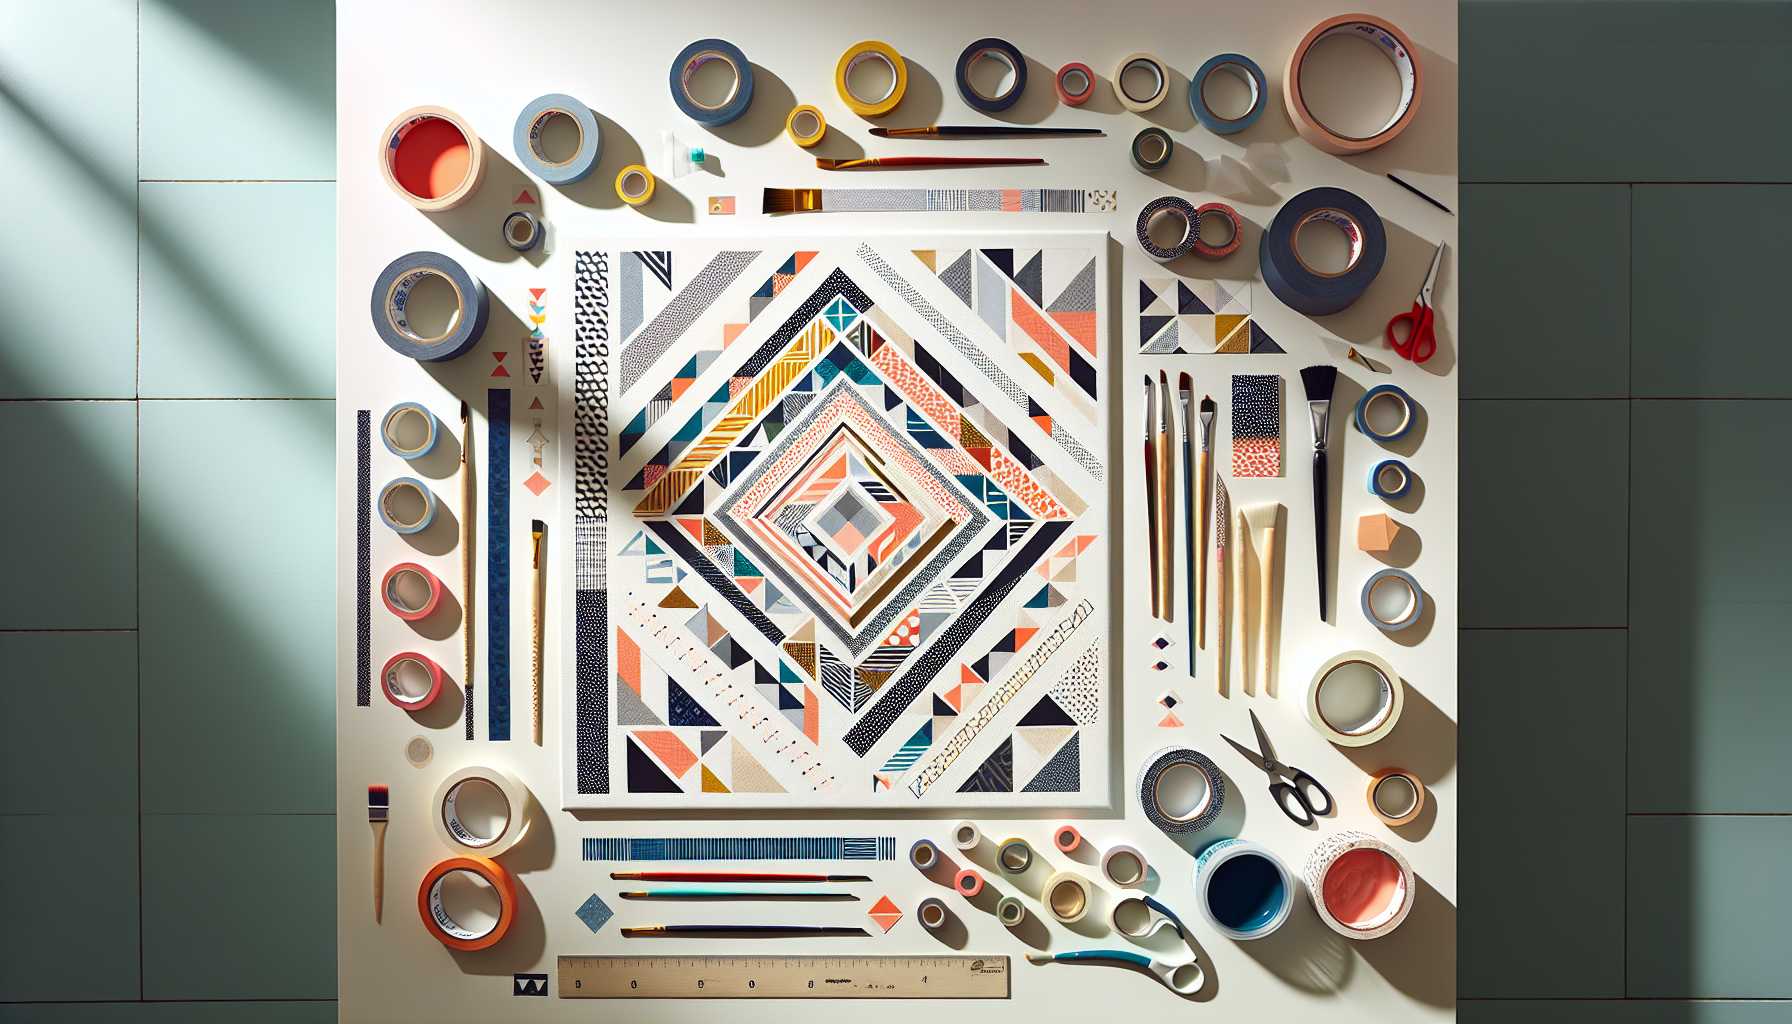
Easy Geometric Art Made Simple: Guide to Washi Tape Painting
Have you ever dreamed of crafting stunning art for your walls, yet found yourself daunted by intricate techniques? Here is the good news: geometric art with washi tape offers the perfect solution for both beginners and seasoned artists. This straightforward technique effortlessly elevates plain canvases into visually striking masterpieces. You need not worry about high-cost supplies or extensive training; all you need is some washi tape and a flare for creativity!
The Advantage of Washi Tape in Art
Washi tape is an artist's closest ally. Crafted from natural fibers, it can be easily peeled off without causing any damage to surfaces or leaving a sticky residue, unlike the traditional masking tape.
The best part about Washi tape? You can reposition it multiple times. Made a blunder? Don't stress over it - simply peel it off and make the necessary adjustments. The flexibility of this material eliminates the worry of damaging your artwork.
The Basic Supplies You Need
Kick-starting this artistic endeavor is reasonably affordable. Below is the list of basic supplies you need:
- Canvas or thick paper (any size)
- Washi tape in a variety of widths
- Acrylic paints (2-3 colors maximum)
- Foam brushes or sponges
- Pencil for light drafting
- Ruler (helpful, but not necessary)
The majority of these items you likely already own. If not, they are readily available at any craft store or online.
Constructing Your Geometric Design
Before you delve right into the project, ensure you take some time to devise a plan. Typically, simple designs embody the most significant visual appeal.
Begin with rudimentary shapes such as triangles, diamonds, or chevrons. The foolproof nature of these patterns always ensures a professional appearance.
Lightly sketch your desired design with a pencil. Don’t burden yourself with perfection - the washi tape will finesse any shaky lines.
Experiment with using an odd number of shapes or sections. Artistic compositions often benefit from an imbalance, finding that three or five elements generally are more aesthetically pleasing than even numbers.
Applying Washi Tape: A Step-by-Step Guide
Now comes the pleasurable part! Proceed to apply your washi tape according to your drafted lines.
Ensure you press down the edges firmly, preventing any paint from leaching underneath. Corners and intersections require careful attention.
For an extra visual appeal, try layering various tape widths. Fine strips can introduce elegant accent lines.
Start from the center and work your way outwards; it helps maintain symmetry in your design.
Patience is virtue during this step. The effort dedicated to careful tape placement reflects in your final outcome.
The Apt Painting Techniques
Less is more when it comes to paint application. Light dabbing strokes are favored over sweeping brush strokes.
Traditional brushes take a back seat to foam brushes and sponges as they provide uniform coverage without disturbing the tape edges.
Apply thin paint layers and allow each layer to dry entirely. Thin, multiple coats often present an improved outcome compared to a single thick and streaky layer.
Avoid overloading your brush with paint, as that usually leads to the paint bleeding under the tape.
The Ideal Timing for Paint Removal
The secret to sharp, neat lines lies in removing the tape while the paint is still somewhat damp.
Approximately 10-15 minutes post your final coat application, the paint should have a slightly sticky feel but not be wet. Commence peeling at a 45-degree angle, drawing back the tape upon itself instead of pulling it straight up.
Timing is essential here - too early, and you could wind up with spoilt spots, too late, and your paint may peel off with the tape.
Perfecting the Art of Color Combinations
The success of your artwork largely depends on your color selection. A simple, understated palette packs the most punch.
Monochromatic schemes (varying shades of a single color) invariably exude sophistication. Experiment with multiple blues or warm grays.
Complementary colors add a dramatic touch. Try combinations like navy and gold, or sage green and coral.
Neutral backgrounds punctuated with a single bright color make for eye-catching masterpieces.
Mending Usual Problems
The most prevalent issue arises when paint bleeds under the tape. Should this happen, do not fret!
While the paint is still wet, utilize a small artist brush to tidy up the edges. The majority of minor bleeds can be quickly rectified.
For subsequent projects, consider using your fingernail or a plastic tool to burnish tape edges.
Having issues with uneven paint coverage? Simply apply another light layer instead of attempting to fix it all in one go.
Finishing Off and Displaying Your Masterpiece
Once your creation is completely dry, take a step back to evaluate your work. Sometimes, minimalism conveys the most beauty.
Consider outlining your artwork with a thin border or highlight with a different colored tape. Remove it immediately after painting to achieve a professional framing effect.
Grouping these art pieces can create an astounding effect. Try making a series of three, employing the same colors but alternating patterns.
Developing Your Geometric Art Skills
Feeling ready for the next challenge? Explore incorporating multiple canvas sizes into a single display.
Seasonal color palettes can also be a fun twist. Use warm oranges and deep reds for fall, or cool blues and whites for winter.
Personalizing Your Artwork
The charm of this technique lies in its adaptability. There is no definitive right or wrong method to produce geometric art.
Trust your gut regarding color and pattern selection. Your distinctive style naturally evolves as you continue experimenting.
Don’t hesitate to push boundaries. Some of the most captivating pieces stem from spontaneous deviations.
Remember, every artist commences their journey as a novice. Each creation educates you something new about the process.
The joy of art is not just the finished product but the journey to create it. Your initial creation may not be flawless, and that’s perfectly alright.
Embark without apprehension; begin with simple designs and gradually build your confidence. Indeed, before long, you’ll find yourself creating intricate geometric masterpieces that mesmerize your friends! Ready to get started?