Simple Spray Bottle Art: Fun Painting Effects for Beginners
Simple Spray Bottle Art: Accessible and Fun Art Technique for Beginner Artists
Have you ever been curious about how to make extraordinary art with the help of a simple spray bottle? Here's a pleasant surprise! Spray bottle art, which is accessible and pleasurable, is one of the best painting technologies for amateurs and experts alike.
The appealing aspect of this technique lies in its capacity to create striking effects that appear much more complex than they truly are. Spray bottle painting is perfect for you if you're a novice artist seeking to discover your creative potential or an experienced artist looking for a unique creative outlet.
Understanding Spray Bottle Art
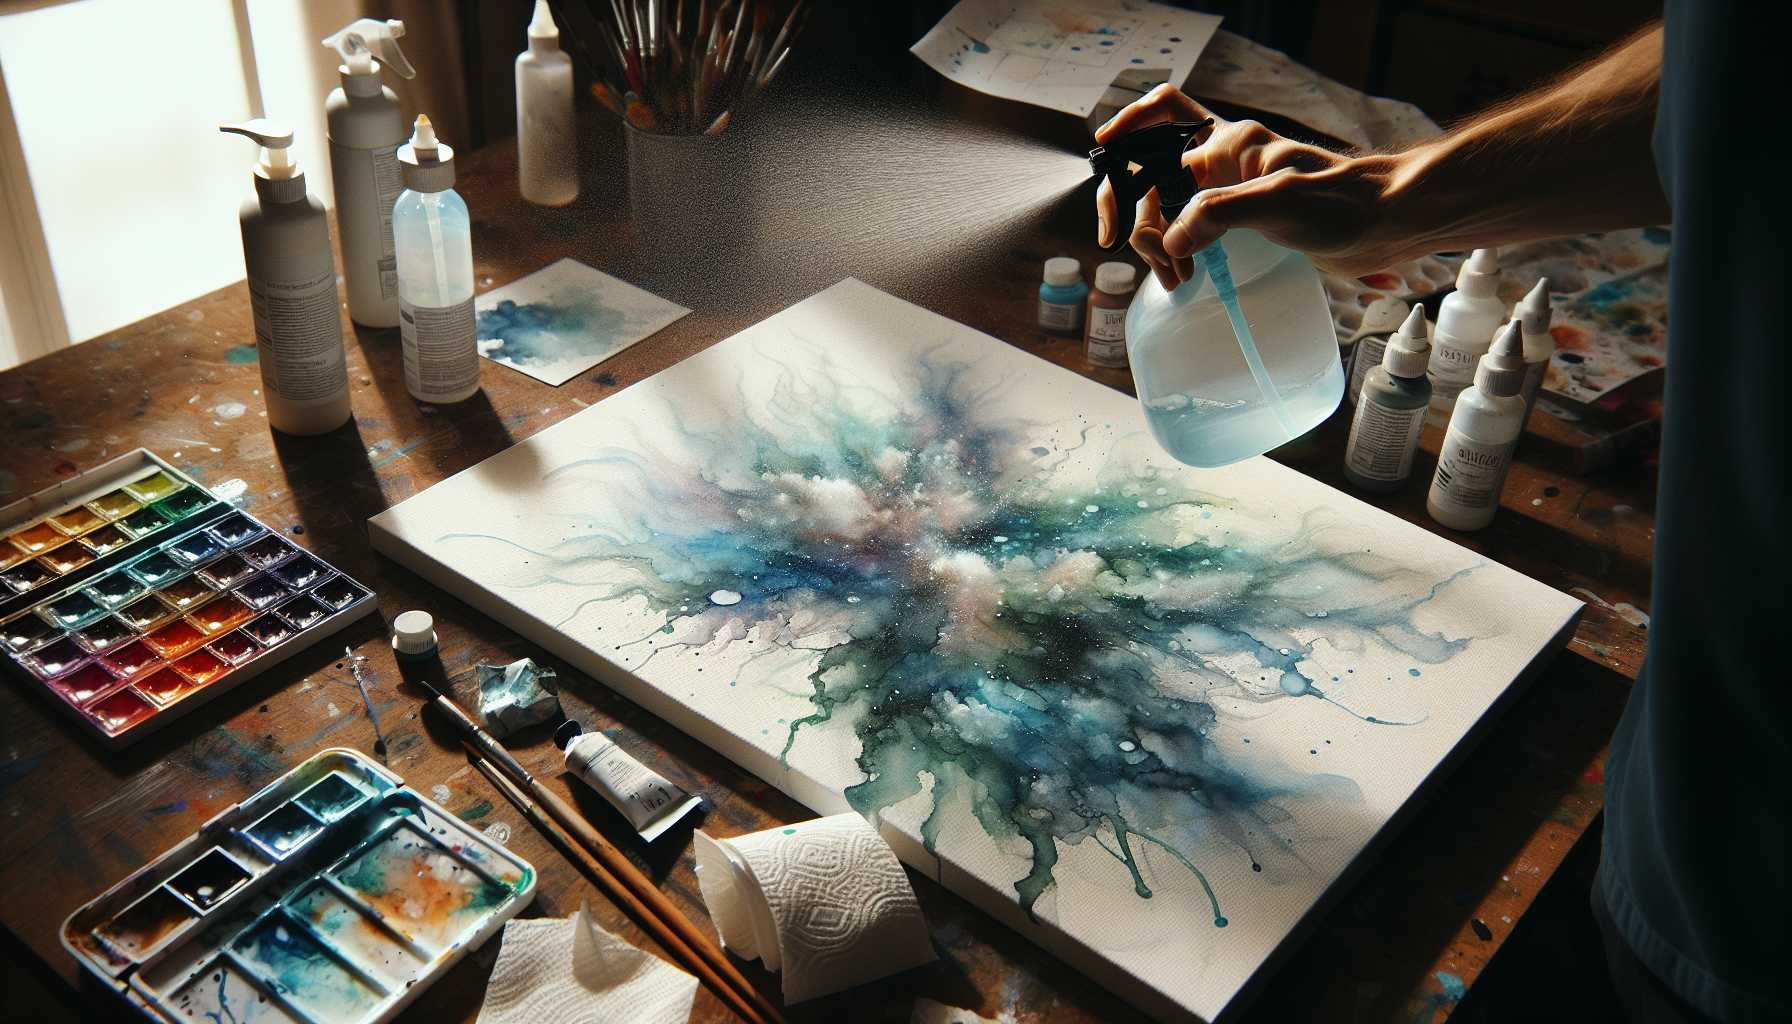
Spray bottle art capitalizes on the effects created by using spray bottles filled with water to achieve distinctive painting patterns and textures. The projection of water on either wet or dry paint creates organic colour blends and patterns that look as if they were sculpted by nature itself.
The unpredictability of water-paint interaction results in creating exclusive art pieces that are nearly impossible to replicate accurately. Many artists find this aspect alluring as it encourages acceptance of pleasant miscalculations and surprises in art.
Tools and Supplies Required
The best part about mastering spray bottle art is that you don't need costly supplies. Here are your essentials:
- Clean spray bottles (two to three different sizes will make a great start)
- Watercolor or acrylic paints
- Canvas or high-quality watercolor paper
- Paper towels
- Clean, clear water
- Plastic or newspaper to protect your workspace
For those feeling adventurous, you can experiment with:
- Salt (to produce unique textures)
- Masking tape (for neat borders)
- Hair dryer (for fast drying)
- Different nozzle settings on your spray bottles
Most items listed above are things you probably already have at home, making spray bottle art an excellent choice for beginners!
Basic Techniques for Spray Bottle Art
Let's consider some simple yet effective techniques. And remember, this technique embraces spontaneity and unique effects rather than perfect uniformity.
Technique 1: The Wet-on-Wet Style
Begin this technique by directly applying the paint on your canvas. While the paint is still damp, gently spray water on the surface of the canvas. You'll notice the water pushing the paint around, creating gentle, fluid effects. This method is particularly apt for creating backgrounds and abstract pieces that often mimic the appearance of watercolor blossoms or galaxies.
Technique 2: The Spray-and-Drop Style
This technique involves filling your spray bottle with diluted paint rather than water. Spray the colored water onto your canvas, then add droplets of clean water or different shades of paint while everything is still wet. The colors will blend into each other naturally, resulting in organic shapes that have an uncanny resemblance to flowers or underwater scenarios.
Technique 3: The Layering Style
This technique requires patience, let every layer dry completely before applying the next. With each subsequent layer, you can build a depth of complexity in your artwork. Start with lighter hues and gradually shift to darker tones. Each new layer will interact differently with the dried layers beneath.
Step-by-Step Guide for Beginners
For those ready to start their first spray bottle masterpiece, here is a straightforward 30-minute project that guarantees stunning results.
Project: Abstract Landscape
Step 1: Set up your workspace by covering the area with plastic. Secure your paper or canvas to a flat surface with tape.
Step 2: Prepare a palette of three diluted colors - light blue, a slightly deeper shade of blue, and green.
Step 3: Start by applying the light blue paint on the top third of the canvas, working rapidly while it is still wet.
Step 4: Gently spray clean water over the wet paint area and observe the delightful blooming effect.
Step 5: Apply the deeper shade of blue below the light blue while they are still damp and let them merge naturally.
Step 6: Do the same with the green color at the bottom, using water spray to create interesting textures.
Step 7: While everything is still damp, lightly sprinkle a small quantity of salt to add texture. Remember to remove the salt once dry.
Congratulations! You have successfully created your first spray bottle artwork.
Creative Effects You Can Accomplish
Spray bottle art unlocks a plethora of creative possibilities. Here are some popular effects beginners can venture into.
Galaxy and Space Themes
Dark backgrounds with spray-applied stars, along with nebula effects, look stunning. Use metallic paints for planets and cosmic dust. The unpredictable nature of spray bottle techniques aptly recreates organic shapes found in photographs of outer space.
Floral and Botanical Themes
Spray techniques create beautiful flowers, blooms, and organic shapes that are brilliant for botanical-inspired pieces. Start by spraying water into wet paint, then tilt your canvas to let gravity create stem-like flows.
Abstract Backgrounds
These styles create breathtaking backgrounds for mixed media pieces. The subtle color variations add depth without overwhelming the accompanying elements. Many artists prefer using spray bottle backgrounds as a starting point for more detailed work.
Tips to Enhance Your Spray Bottle Artwork
Interested in enhancing your spray bottle art skills? Here are some tips that can refine your work.
Regulate Your Water Flow
Different nozzle settings will create different effects. A fine mist will create subtle blending, while a stronger stream will create bold, dramatic patterns. The distance from which you spray can also impact the overall effect; try different distances for varied results.
The Perfect Timing
The degree of wetness of your paint significantly affects the outcome. Extremely wet paint creates gentle, flowing blends, while slightly damp paint produces more controlled effects. A hairdryer can help control the drying times and will assist you in governing the development of the effects.
Cherish Unanticipated Surprises
Some of the best aspects of spray bottle art are completely unplanned. An unforeseen drip, an unexpected color blend, might be precisely what your piece needs. Rather than trying to control every element, let the medium steer your creation towards something unexpected and unique.
Troubleshooting Common Challenges
Like every art form, it's common for beginners to face challenges. Here are some solutions to the most common issues in spray bottle art.
Muddied Paint
This usually occurs when too many colors mix together. Stick to a maximum of 2-3 colours for a more distinct result. Also, allow each layer to dry before adding a new one. Mixing wet paint can result in muddy hues.
Effects Lack Dramatic Quality
If you want more pronounced effects, try using more water or a stronger spray setting. At times, beginners may be overly cautious with their spraying. Additionally, ensure your paint isn't too thick - thin, flowing paint interacts better with spray bottle techniques.
Paint Remains Static
The paint might be too dry or thick. You can add some water to reactivate it, or ensure you're working quickly enough while the paint is still wet. If you're in a hot, dry environment that makes paint dry faster, consider using a spray bottle with clean water to maintain the dampness of your work surface.
Enhancing Your Art with Spray Bottle Techniques
Once you feel comfortable with the basics, there's plenty to do to enhance and develop your spray bottle art skills further.
Blend with Other Techniques
Spray effects look stunning when combined with traditional brushwork. You can use spray techniques for creating backgrounds and then add details with brushes. Using masking tape results in neat edges next to spray bottle areas, creating interesting contrasts between controlled and organic areas.
Experiment with Various Paints
Watercolors and acrylics are an excellent start, but consider trying fabric paints for textile pieces or even food coloring for temporary outdoor art pieces. Every paint type behaves differently with water, and exploring these variations can introduce you to unique effects.
Participate in the Community
Many online forums and communities dedicated to spray bottle art, provide techniques, inspiration, and a platform to share your work. Don't hesitate to share your creations! The spray bottle art community is typically very welcoming and offers valuable support for beginners.
Concluding Thoughts
Spray bottle art is a testament to how creativity doesn't require expensive tools or extensive training. With supplies costing just a few dollars, you can create pieces that rival those in expensive galleries.
Every piece of art you create will be distinctive and unique. The dynamic and unpredictable interaction of water and paint means you'll never create the same piece twice. So, grab a spray bottle and let your imagination flow! Remember, in spray bottle art, there are no mistakes, just happy discoveries waiting to be unveiled.
The joy of creating something beautiful and seeing it come to life never loses its charm. Spray bottle art takes you back to the simple delight of playing with colors and water but with sophisticated results that you'll be proud to showcase. So, go ahead and embrace this wonderful art technique, and enjoy your journey through the fascinating world of spray bottle art.