Simple Mandala Dot Painting: Complete Guide for Beginners
A Basic Guide: How to Start with Mandala Dot Painting for Beginners
Have you ever been enchanted by the captivating dotted mandala art and desired to create one yourself? You've landed at the right spot! Mandala dot painting is an incredibly soothing and highly rewarding art form that you will find alluring once you embark on it.
Understanding Mandala Dot Painting
Mandala dot painting is a captivating fusion of the age-old mandala creation art and contemporary dotting techniques. The term "mandala" is derived from Sanskrit and signifies "circle." These eye-catching designs span out from a central point, creating a perfectly symmetrical pattern.
The foundation of dot painting can be traced back to Aboriginal Australian art. When amalgamated with mandala patterns, it results in beautiful and immersive artwork. And the best part is, you don't need to be an accomplished artist to try your hands at it!
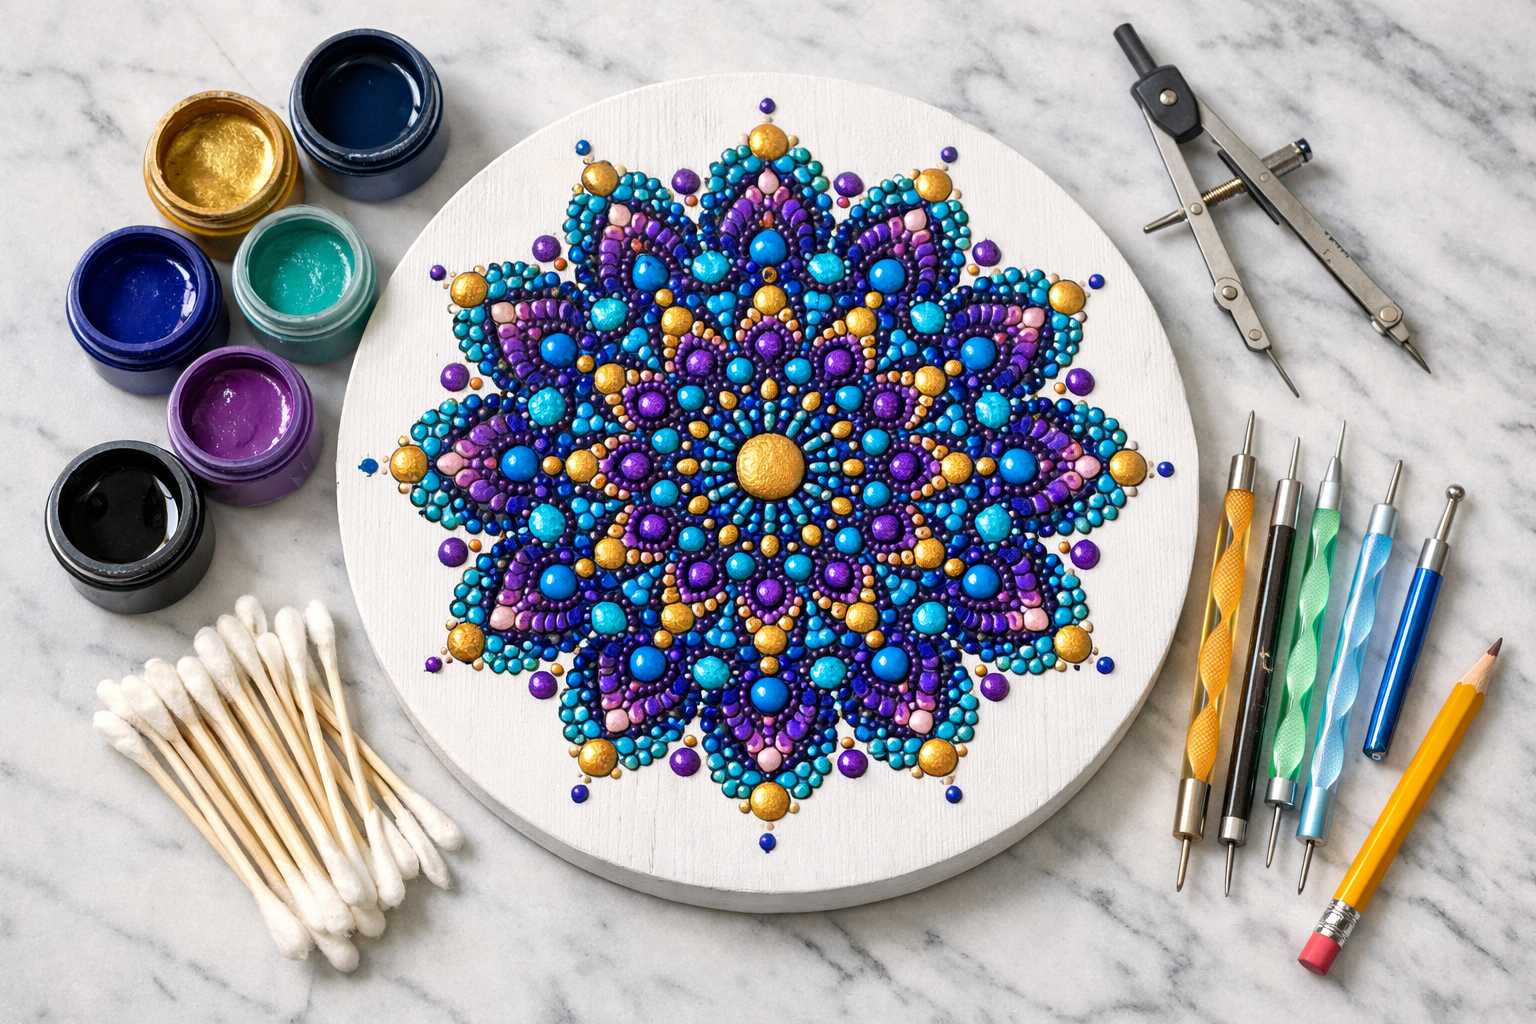
Must-Have Supplies for Mandala Dot Painting
Starting up does not require expensive art materials. Here's your checklist:
Basic Essentials
- Acrylic paints (Begin with 3-4 shades)
- Dotting tools (or improvised substitutes)
- A canvas or wooden surface
- Paper plates to serve as paint palettes
- A pencil for preliminary sketching
- A ruler or compass
Substitutes for Dotting Tools
Don't possess professional dotting tools? No problem! You can utilize these everyday items: - Cotton swabs (Q-tips) - Pencil erasers - Toothpicks - Bobby pins - Paintbrush handles
Starting Off with Your First Colors
Choosing colors as a beginner can feel quite daunting. Keep it simple! Opt for three colors that go well with each other:
- Monochromatic: Different hues of blue
- Complementary: Blue and orange
- Analogous: Blue, green, and purple
White paint is your greatest ally as it introduces highlights and amplifies other colors beautifully.
A Stepwise Process to Mandala Dot Painting
Step 1: Prepare Your Design
Start off with an uncomplicated design. Sketch a small central circle on your canvas and add larger circles around it for guidance.
Keep it straightforward for your initial trial. Complex designs can wait until you get a firm hold of the basic techniques.
Step 2: Establish the Center Point
Your design will revolve around a central dot. Make it a little larger than the other dots and use your most striking color for an attention-grabbing impact.
Step 3: Expand Outward in Circles
Start from the center and work your way out. Form circles of dots around your focal point while maintaining consistent spacing between each dot to achieve that satisfying mandala symmetry.
Start with eight dots in each circle for beginners. This will simplify the division of your circle.
Step 4: Introduce Pattern Variations
Once you've got the hang of simple dots, you can try a few variations: - Dots of varying sizes - Connecting dots with lines - Forming petal shapes with multiple dots - Adding small accent dots between larger ones
Step 5: Layer and Enhance Complexity
As you gain confidence, add more circles. Alternate colors to create visual appeal. Make sure each circle complements the preceding one.
Beginner-Friendly Techniques for Dot Painting
The Basic Dot
Load your tool with paint and hold it perpendicular to the surface. Apply straight down and lift straight up without twisting or dragging the tool.
Consistent Dot Size
Ensure smooth paint consistency and reload your tool as needed. Practice on paper initially to get the hang of it.
Perfect Spacing
Estimate the spacing with your eye initially. As you practice, you will develop an instinct for natural spacing. Remember, small imperfections add individuality!
Color Blending
While the dots are still wet, slightly blend the colors. This forms beautiful gradient effects within your mandala.
Common Beginner Missteps to Steer Clear Of
Hurrying the Process
Mandala dot painting is meant to be calming. Take your time, as rushing often leads to uneven dots and uneven spacing.
Overloading with Paint
Remember, less is more! Excessive paint leads to messy and overly large dots. Keep the consistency of your paint akin to thick cream.
Starting with Complex Designs
Always start with simple patterns. Master the basic techniques before moving on to intricate designs. Your skills will naturally evolve with each project.
Neglecting to Plan
Always sketch your design first. This prevents unexpected design mishaps midway through your project.
Design Suggestions for Your Initial Projects
Straightforward Flower Mandala
Begin with a central dot. Add eight dots around it to resemble petals. Progressively build outward with colors that complement each other.
Geometric Designs
Use simple lines and shapes. Squares and triangles pair wonderfully with dot techniques.
Nature-Inspired Themes
Draw leaves, the sun, or waves using dotting patterns. Nature provides infinite inspiration for novice artists.
Preserving Your Artwork
Protecting Your Work
Once your mandala dries, ensure to protect it with a clear acrylic sealant. This will not only safeguard your effort but also enhance the colors.
Storing Your Work
If possible, store flat and away from direct sunlight to protect colors from fading. With appropriate care, your mandala can last for years.
Constantly Enhancing Your Skills
Regular Practice
Carve out some time for regular practice. Even a mere 15 minutes daily can significantly enhance your technique.
Learn from Other Artists
Browse through mandala dot painting works online. Instagram and Pinterest are amazing platforms for fresh inspiration. Take note of techniques and color combinations that catch your eye.
Engage with Communities
Connect with other art enthusiasts within the mandala dot painting community. Online groups are an excellent source for tips, motivation, and fresh inspiration.
Experiment with Different Surfaces
Once you've got the basics down, try your hand at different surfaces. Stones, wood, and fabric can present novel creative dimensions.
The Therapeutic Advantages
Mandala dot painting offers remarkable stress relief. The repetitive hand motions calm your mind. It organically invites mindfulness.
Many practitioners describe the process as akin to moving meditation. Your breathing naturally slows down and worries retreat as your focus shifts to creating beauty.
Overcoming Common Obstacles
Uneven Dots
Monitor your paint consistency and better your hand position. Applying consistent pressure results in uniform dots.
Smudged Designs
Allow each section to dry before progressing. Keep your hand on a paper bridge to avoid touching wet paint.
Discolored Designs
Keep your tools clean and try to use separate tools for light and dark colors when possible.
Advancing Your Artistry
Once you've mastered the basics, you can venture into advanced techniques: - Metallic accents - Texture mediums - Mixed media elements - Larger, more intricate compositions
Last Words
Mandala dot painting is an exquisite blend of creativity and meditation. Imperfections are just part of the learning curve. Every dot introduces a novel lesson.
Get started today! Gather your basic supplies and commence with straightforward patterns. You'll astound yourself with your creations!
Always remember, every expert started as a beginner. Your distinct style will naturally emerge. The most important part is simply embarking on your creative journey.
Enjoy the process, be patient, and have fun immersing yourself in the serene process of crafting beautiful mandala dot art. Your artistic voyage begins now!