Simple Fork Painting Techniques: Easy Pattern Art Tutorial
Easy Fork Painting Techniques: A Step-by-Step Art Guide
Ever glanced at your cutlery and imagined it as a piece of artistic arsenal? Indeed, it can be! Fork painting is a simple yet fun-filled method to craft lovely patterns and textures in your art.
This technique emerged unexpectedly when my toddler nonchalantly grabbed a plastic fork during art time. An initially messy situation evolved into hours of inventive explorations. Since then, fork painting has ascended to become our favorite indoor activity for drizzly afternoons.
Your First Encounter with Fork Painting
Ideal for novices, fork painting does not require any fancy brushes or specific skill set. All you need to do is select a fork from your kitchen stash and get ready to weave your magic.
And the most amusing part? Both adults and children are equally smitten with it. It’s delightful to watch timid kids bloom with excitement when they realize they can craft such exquisite patterns using a mundane object.
Essential Equipment
- Plastic or metal forks (children find plastic ones easier to handle)
- Acrylic colors or easily washable tempera paints
- Sheets of paper or canvas
- Paper plates to serve as paint palettes
- A container filled with water
- Paper towels
- An apron or old attire to avoid stains
Core Fork Painting Techniques
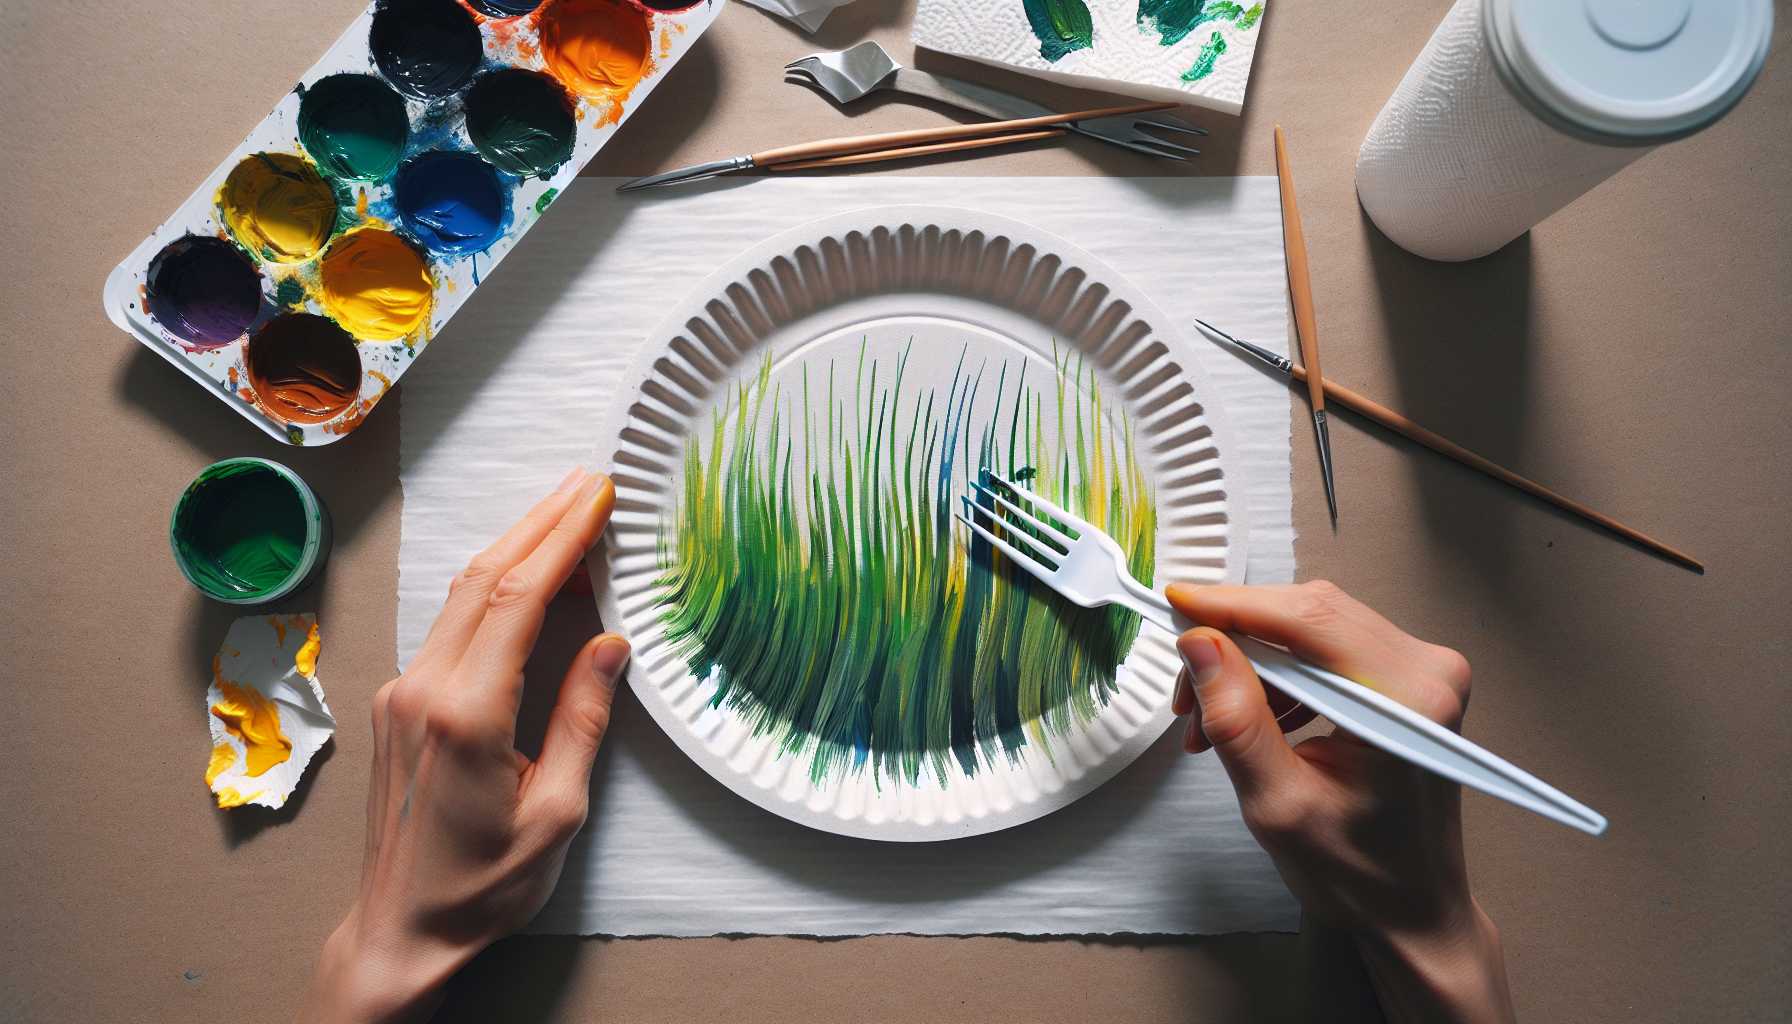
The Traditional Drag Method
This is the typical starting point for most fork painting enthusiasts. It’s straightforward and provides immediate gratification.
Immerse your fork in paint, ensuring all the prongs are well-coated. Plant the fork on your drawing paper and pull it across in a single, fluid motion. The effect is a series of graceful parallel lines that mimic grass, fur, or abstract patterns.
I particularly cherish exploiting this method to simulate meadow landscapes. A trail of vibrant green paint dragged upwards results in a surprisingly genuine grass-like texture.
The Stamp and Uplift Technique
Dab your fork in paint and press it firmly down onto the paper. Pulling it directly upwards without sliding creates a series of spots or short lines.
This technique is ideal for designing: - Petals of flowers - Foliage on trees - Textured backgrounds - Abstract art compositions
The Rotate and Lift Style
This technique adds an intriguing twist to fork painting. After imprinting the fork on the paper, give it a slight rotation before raising it. The result? Arcuated, lifelike figures that infuse dynamism into your artwork.
Accidentally discovered by my daughter, this method is now her most-loved way to depict flowers and butterflies.
Creative Ways to Draw Patterns
Skies at Sunset
Employ the drag technique with warm hues. Begin with yellow at the base, proceeded by orange, then red, and finally a hint of purple at the apex. This orchestra of colors naturally represents beautiful wisps of clouds.
Marine Waves
Pull across horizontal strokes with assorted shades of blue intermingled with white. The fork prongs excellently imitate the shimmering light on the water's surface.
Blooming Gardens
Unleash the power of all three techniques. Implement the stamp and lift process for flower centers, rotate and lift technique for petals, and the traditional drag method for stems and blades of grass.
Abstract Surfaces
Ignite your boundless creativity. Superimpose diverse colors and techniques to design unique textures that would seem unattainable with a regular brush.
Tips to Achieve the Best Results
The Ideal Fork
While plastic forks are safer for children and easier to clean, metal ones generate thinner lines and retain more colour. Test with both types to discover your preference.
The Perfect Paint Viscosity
Your paint should be dense enough to stick to the forks but also sparse enough to flow effortlessly. If it appears too thick, dilute it with a smidgen of water. If too thin, allow it to air dry for a few minutes.
The Art of Quick Action
Fork painting yields the best results when the paint is still damp. Draft your design and work on individual sections rather than letting painted areas thoroughly dry.
The Advantage of Layering
Don’t hesitate to overlap colours over dried patches. Applying assorted colors and techniques in layers lends remarkable depth and appeal to your artwork.
Resolving Frequent Problems
Paint Doesn’t Adhere to the Fork
Your paint may be too runny. Attempt to use it directly from the container or let it air to achieve the desired consistency.
Lines Appear Uneven
Ensure you’re applying consistent pressure and maintaining a steady speed. It’s advisable to practice on scrap paper first.
Colors Seem to Blend
This tends to occur when mixing several colors or when you neglect to clean your fork between color changes. Keep a water container nearby for swift rinses between colors.
Advanced Fork Painting Concepts
Once you’re well-versed with the basics, challenge yourself with these inventive tasks:
Negative Space Artwork
Design patterns using masking tape, then paint around them. Peel off the tape to unveil crisp shapes merged with textured backgrounds.
Combination of Media Designs
Combine fork painting with other art forms. Fine-tune details with markers, create backgrounds with watercolors, or collage additional objects for an ornamental touch.
Thematic Seasons
Craft a series inspired by the changing seasons. Blazing summer sunsets, autumn leaves, frosty winter scenes, and verdant spring grass can be stunningly represented using fork techniques.
Cleaning and Storing Recommendations
Cleaning is more convenient than you might assume. Plastic forks can be cleaned in your dishwasher, and stubborn stains can be removed by soaking them in warm, soapy water.
Store your finished artwork flat until you decide to exhibit them. Framed or mounted on colorful paper, fork paintings add a unique charm to your decor.
The Charm of Fork Painting
There is a certain enchantment associated with transforming everyday objects into artistic equipment. Fork painting eliminates the pressure to achieve the “perfect” brush stroke, focusing instead on color arrangement and texture, which the utensil itself naturally generates.
I have observed on numerous occasions how a switch from brushes to forks can transform an exasperated artist into a relaxed creator. The unforeseen results of this style can spark creativity and bring joy.
Conclusion
Fork painting is a testament to the fact that art supplies need not be costly or intricate. Often, the most awe-inspiring artwork is born from the simplest tools and techniques.
Next time you’re desiring a creative venture, bypass the art store and delve into your kitchen drawer. There lies a potential primary art tool - a humble fork.
Remember, there’s no ‘incorrect’ way to indulge in fork painting. Experiment, have fun, and appreciate the process. Your distinct style will naturally evolve as you discover these simple yet potent techniques.
Enjoy your artistic endeavor!