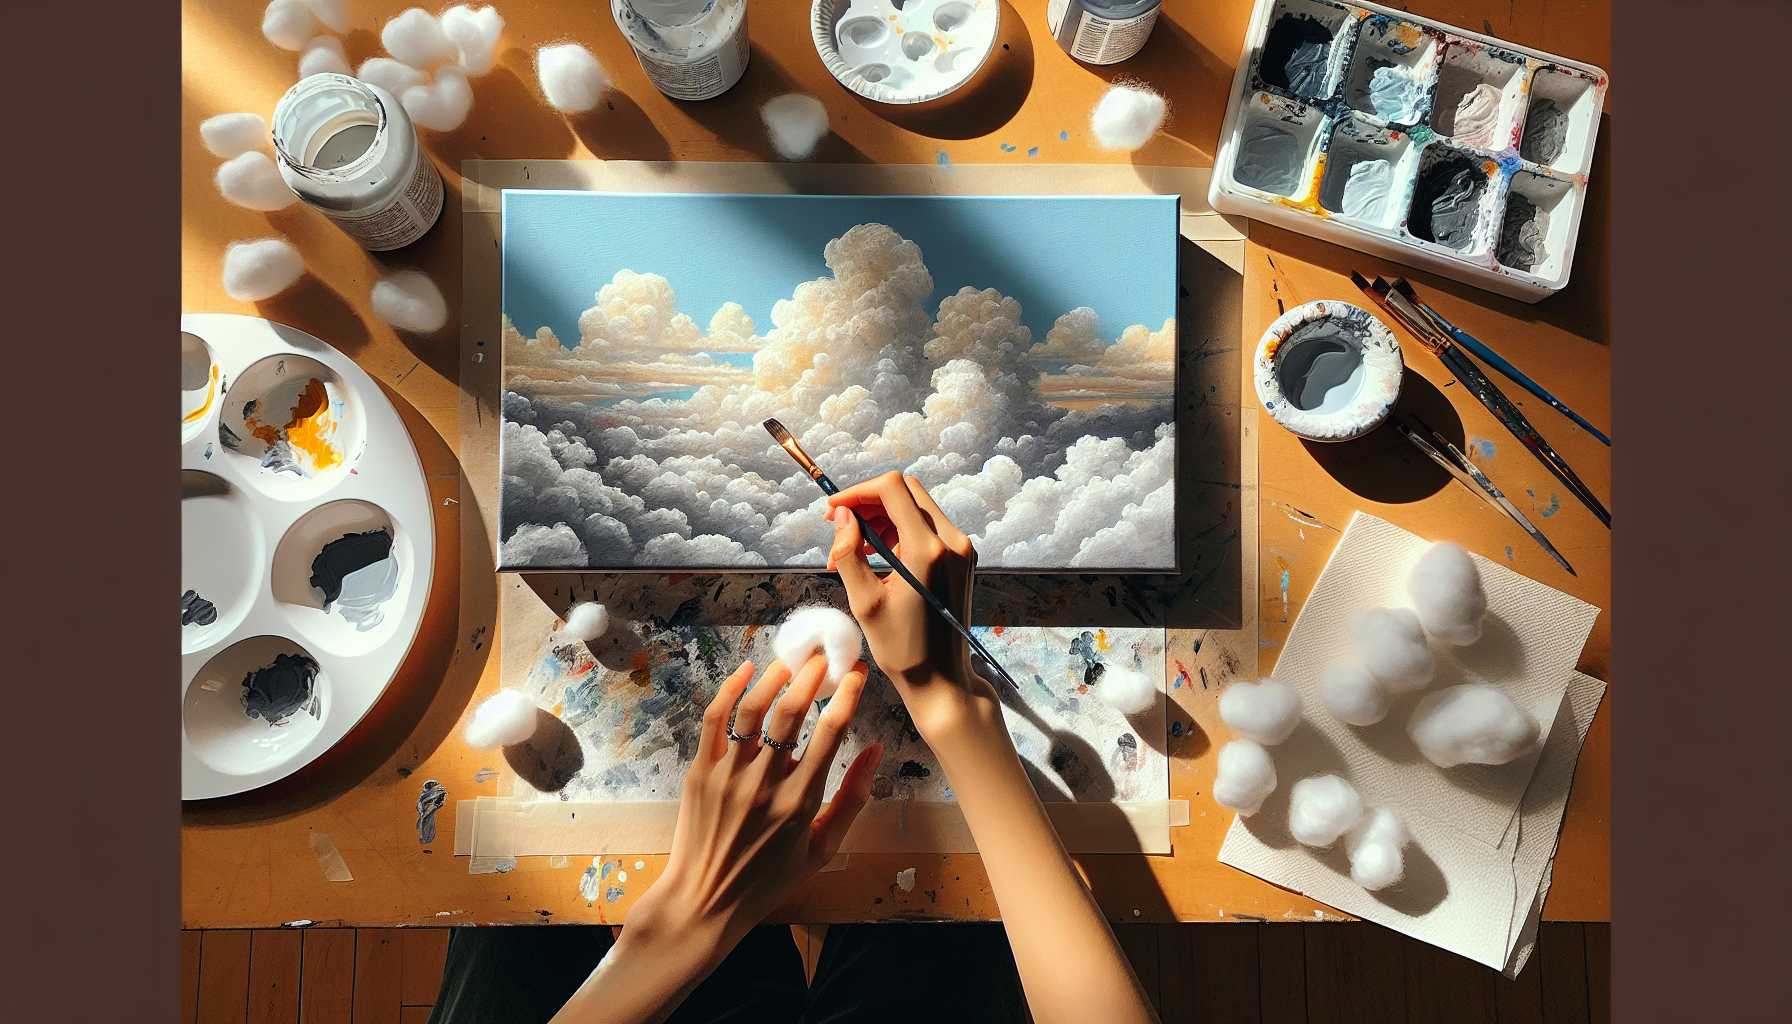
Simple Cotton Ball Painting: Cloud Effect Tutorial for Beginners
Simple Painting Tutorial with Cotton Balls: Creating a Cloud Effect for Novices
Does your attempt at painting realistic clouds leave you feeling like you're up in the air? Well, you're not alone! Cloud painting is one often difficult for beginners. However, there's a not-so-kept secret: cotton balls can entirely revamp your cloud painting skills.
With this straightforward method, even amateurs can craft stunning, fluffy cloud effects in no time. Let us explore this foolproof method of painting clouds with the help of cotton balls.
The Reason Behind Cotton Ball Painting’s Effectiveness
Cotton balls naturally imitate the textures of clouds. Owing to their soft, fibrous structure, they can perfectly replicate cloud-like patterns, making them an excellent tool for creating realistic sky scenery on canvas.
Moreover, the method is forgiving. Mistakes can easily blend into the overall cloud effect, inviting you to confidently experiment with various techniques.
Essential Materials
Gathering necessary supplies is pretty straightforward. Here's what you need:
- Cotton balls or cotton pads
- Acrylic paints (white, blue, gray)
- Canvas or paper
- Small dishes for mixing paint
- A container of water
- Paper towels
Most of these items are probably already available in your household, and you won't need any fancy brushes!
Setting up Your Workspace
Choose an area with plenty of light, preferably natural, for the best color visibility. Protect your working surface with a cover of newspaper or plastic.
Keep a water supply at hand for quick clean-up operations, and have paper towels easily accessible. Organizing your workspace contributes to a smoother painting process.
Easy-to-Follow Cotton Ball Cloud Painting Guide
Crafting the Sky Background
Begin with a light blue base. Dilute blue paint with a generous amount of water and spread this mixture over your entire canvas using wide strokes.
There's no need for perfection at this stage. Any minor imperfections will be covered by clouds later. Allow this foundation layer to dry thoroughly before you proceed.
Preparing Your Cloud Colors
Real clouds aren't as white as you'd think. They contain subtle gray and blue shadows. So mix these colors on a plate to prepare:
- Pure white for bright highlights
- Light gray for areas in shadow
- Extremely light blue for clouds in the distance
Having these ready saves significant time during the painting process.
Practicing the Cotton Ball Technique
Now starts the exciting part! Lightly dip your cotton ball in white paint, being careful not to oversaturate it.
Gently dab the cotton ball onto your canvas, using a bouncing action rather than dragging it along. This technique generates naturally fluffy textures.
You can achieve different effects by adjusting the pressure. Light touches render wispy clouds, whereas firm pressure creates denser cloud formations.
Incorporating Depth and Shadows
Switch to your gray mixture using a fresh cotton ball. Apply the gray paint along the lower edges of your clouds.
This technique creates an illusion of depth, making the clouds seem three-dimensional rather than flat. The effect is instantly noticeable.
Blending and Refining
While the paint is still damp, soften any harsh edges using a clean, dry cotton ball. Gentle dabbing motions work best for this task.
This process ensures smooth transitions between colors, leading to a more natural and atmospheric appearance of your clouds.
Common Mistakes Beginners Should Stay Clear Of
Over-Using Paint
This technique subscribes to the "less is more" philosophy. Cotton balls heavy with paint end up creating unattractive splotches. Start with small paint quantities.
You can always add more layers if needed. But remember, it's much more complicated to remove excessive paint.
Neglecting Light Sources
You should decide where the sun is situated in your painting because this decision will influence the placement of shadows on your clouds. Consistent lighting makes your scenes appear more believable.
Generally, the upper parts of clouds should be brighter, while the lower areas tend to have more shadows.
Creating Uniform Clouds
Real clouds are diverse. Some are large and fluffy, others small and wispy. So to make your painting realistic, mix different sizes and shapes in your depiction.
Avoid making clouds in rigid patterns. Natural randomness gives a more authentic look.
Advanced Cotton Ball Techniques
Crafting Storm Clouds
Incorporate darker grays and even tinges of purple. Gradually build up layers for dramatic effects. Contrast these colors with radiant white highlights.
Storm clouds have more defined peripheries, so use firm pressure with your cotton balls for this.
Sunset Cloud Effects
Warm hues can transform ordinary clouds into breathtaking sunset clouds. Add hints of orange, pink, and yellow to give a sunset feel.
Apply these colors when the base paint is still a little wet, so as to make the colors beautifully blend into each other.
Distance and Atmosphere
Distant clouds appear lighter and less defined. Use very faint colors for such clouds. The clouds in the foreground should be more vibrant and detailed, adding depth to your art.
Troubleshooting Common Problems
Paint Drying Too Rapidly
If your paint dries too quickly, separate your painting into smaller sections. Lightly mist your palette with water, which will substantially extend the working time.
A few drops of acrylic retarder medium, mixed with paint, can also prove to be very helpful in slowing down the drying time.
Cotton Balls Coming Apart
With cotton balls, quality matters. Cheaper ones tend to disintegrate quickly, so investing in quality cotton balls will ensure smoother results.
Cotton pads serve as a sturdier alternative as they retain their shape longer during painting sessions.
Achieving Muddy Color Results
Clean your cotton balls between different color applications. Dirty cotton balls can muddy your paint mixtures. Whenever possible, use separate cotton balls for each color.
Finishing Your Cloud Artwork
Take a step back to evaluate your work. Identify areas that may need more highlights or shadows, and make any necessary small adjustments.
If needed, you can add final details using traditional brushes. For instance, fine brushes work well for creating thin, wispy edges on clouds.
Looking after Your Finished Artwork
Allow the acrylic paint to cure completely, which typically takes about 24 hours. Refrain from touching the surface during this time.
Consider using a varnish for protection. Acrylic varnish helps preserve colors and prevents dust accumulation.
Why Beginners Should Try Cotton Ball Painting
Cotton ball painting demystifies the process of crafting clouds. The nature of the technique is such that it is forgiving of mistakes. Any unplanned deviation often ends up enhancing the end result.
You'll find yourself improving quickly and gaining confidence. This technique also tends to yield faster results than traditional brush techniques, which is encouraging for continued learning and experimentation.
Developing Your Skills Further
Once you grasp the basic method of painting clouds with cotton balls, you're free to experiment with different cloud types and weather conditions. Each practice session progressively enhances your skills.
Consider blending this technique with typical brushwork. The combination creates rich, diverse textures in your art.
Concluding Thoughts on Cotton Ball Cloud Painting
This uncomplicated technique uncovers new artistic possibilities. You don't need years of training to create remarkable clouds. Cotton balls can make painting realistic clouds a breeze for everyone.
Begin practicing today with materials that you likely already have at home. Your prowess in painting clouds will grow exponentially. You'll find yourself creating stunning sky scenes that surprise and delight your friends and family soon.
Remember that even experts started as beginners once. This cotton ball technique gives you a booster to start your fabulous artistic journey. Revel in the process and cherish your creative evolution.