Paint Dripping Art: Simple Techniques for Beautiful Results
Introduction to Paint Pouring Art: Easy Techniques for Striking Results
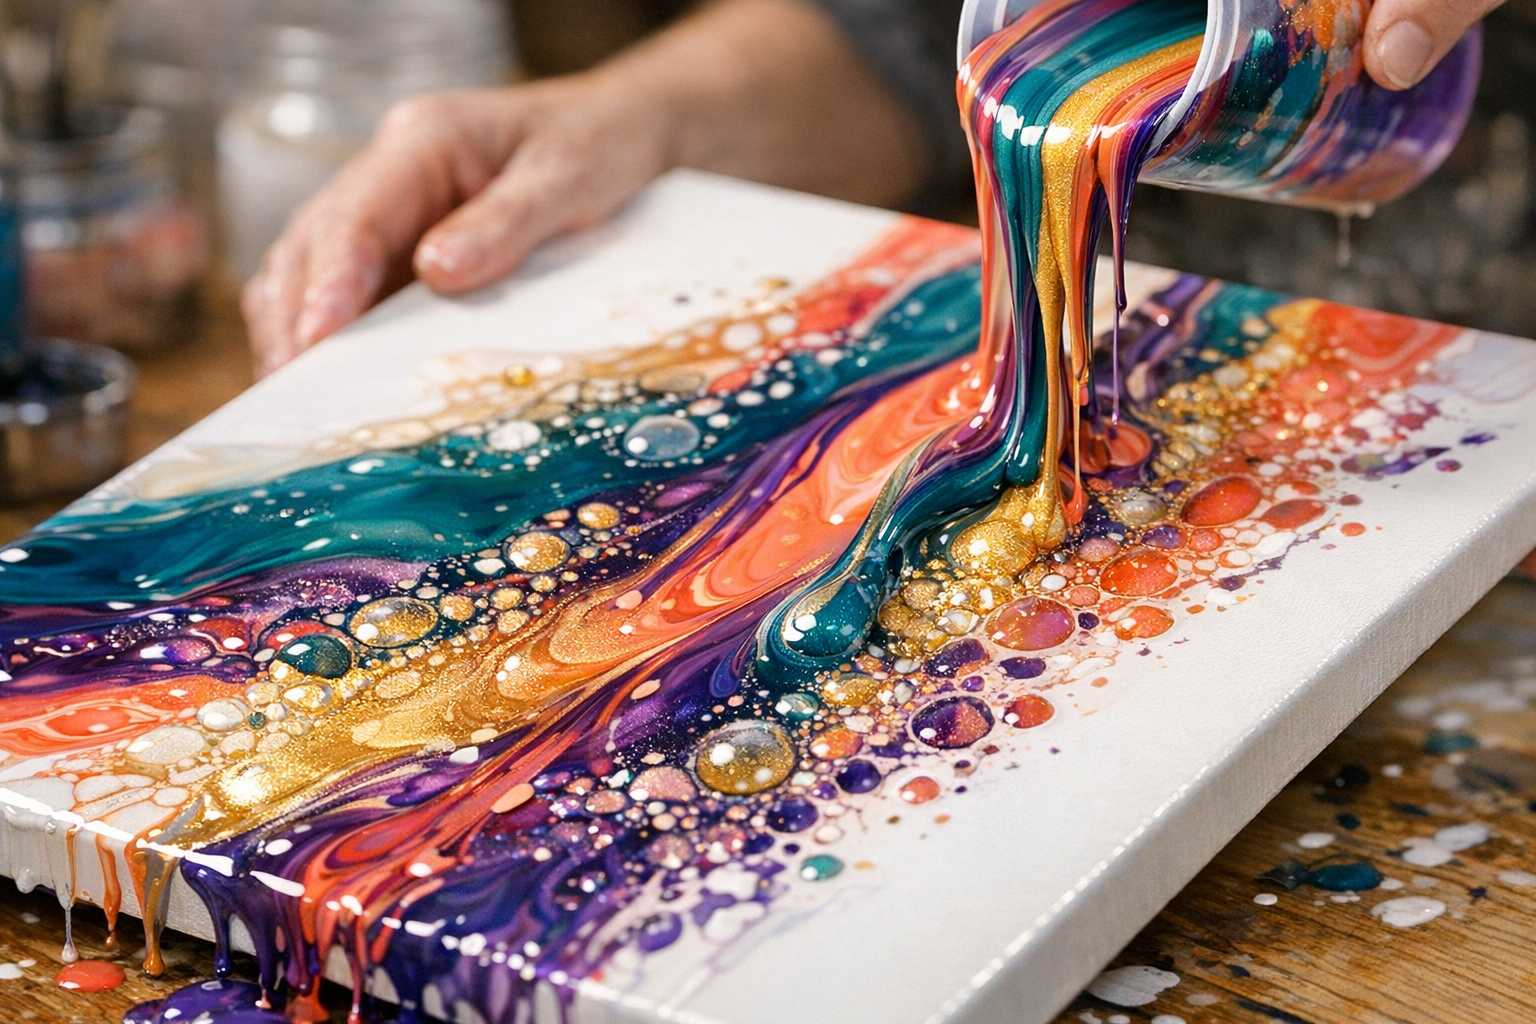
Do you find a mesmerizing appeal in the flow of paint across a canvas? The same enchantment is crafted by paint pouring art. Among the most soothing and fulfilling artistic pursuits you can venture into today.
Beyond just paint, this technique morphs mundane materials into flowing masterpieces. It doesn’t necessitate extensive training or costly tools, just a readiness to lose control as colors dance as one.
What's the Appeal of Paint Pouring Art?
Paint pouring art is the embodiment of regulated chaos. While you can steer the paint, the slight elements of disorderliness make every piece unique. This unpredictability ushers in distinctive patterns every time.
The process is almost meditative. Watching the merging and movement of colors naturally lessens stress. It's often described by artists as therapeutic and deeply gratifying.
Each piece narrates its unique tale. The paint forms organic shapes that mimic natural entities — rivers, clouds, and abstract vistas appear without premeditation.
Basic Supplies to Get You Started
Setting off on your paint pouring journey needn’t break the bank. Here's a list of essentials that guarantee impressive results.
Canvas or Surface - Regularly stretched canvas works faultlessly - Canvas boards are a cost-effective alternative - Wood panels offer intriguing textures - Even cardboard can be used for informal practice sessions
Selection of Paints - Acrylic paints promise beautiful flows - Fluid acrylics offer the best results - Heavy body paints may require dilution - Prioritize quality over variety
Mixing Mediums - Pouring mediums ensure smooth flows - Water is effective for basic dilution - Silicone oil creates interesting cells or bubbles - Floetrol facilitates a smooth glide of paint
Fine-Tuning Your Paint for Optimal Flow
The secret to stunning paint pouring art is the consistency of the paint. Comparable to honey or warmed syrup. If too dense, it won't flow, but if overly thinned, colors can muddy.
Blend your paint with medium gradually, adding in small increments. Testing the consistency involves lifting your stirring tool, the paint should cascade in ribbons that dissolve back into the blend.
Typical Mixing Ratio: - 2 portions of paint - 1 portion of pouring medium - A few droplets of silicone oil (optional)
Stir cautiously to steer clear of air pockets, which can yield undesired gaps in your ultimate piece. Some artists rest the mixed paint for half an hour prior to using.
The Foundational Drip Technique
This original technique spellsbinds viewers with stunning vertical flows. It is apt for novices and assures consistent results.
Begin with your canvas upright or inclined at a slight angle. Spill the paint along the top edge. As gravity comes into play, the colors cascade downward.
Step-by-Step Guide: 1. Set your canvas in a vertical position 2. Spill your foremost color along the top edge 3. Incorporate harmonious colors as the paint flows 4. Slightly tilt to steer direction 5. Allow to dry absolutely flat
Observe how the hues interact when they converge. Whether they merge seamless or form evident strata, both phenomena amplify the visual appeal of your work.
Cup Pouring for Lively Effects
Cup pouring generates explosive color fusion. This technique involves layering varied colors in a cup before pouring onto the canvas, a method that continually captures even seasoned artists off-guard.
Choose colors that augment each other. Warm colors painted together yield delightful results, while cool colors produce soothing effects. Contrasting shades make dramatic assertions.
Layering Your Cup: 1. Start with your darkest shade 2. Add lighter hues in thin stratums 3. Refrain from stirring - let colors segregate organically 4. Steadily pour from a singular elevation
As the paint diffuses, it will form natural patterns. You can reorient your canvas to channel the flow, each tilt generating new color synergies.
Flip Cup Surprises
The Flip cup technique injects an unexpected element to every pour. Fill your cup with layer upon layer of colors. Invert it on your canvas, lift swiftly and revel in the ensuing spectacle.
This method sparks a central eruption of color. Paint radiates outwardly forming organic patterns. The results are spontaneous, teeming with life and vibrancy.
Perfect Flip Cup Steps: 1. Layer colors in a disposable cup 2. Place canvas face-down on the cup 3. Swiftly flip the setup 4. Allow it to sit for half a minute 5. Lift the cup in an upward direction
Avoid getting a sneak peek too early! Let the paint settle before lifting your cup. The wait makes the eventual unveiling even more thrilling.
Color Theory for Impressive Combinations
A basic understanding of color relationships can instantly refine your paint pouring art. No need for intricate memorization, just a few rudimentary principles can suffice.
Complementary Colors Colors positioned opposite on the color wheel generate vibrant discord. Red and green combine strikingly, blue and orange implicate energy, while purple and yellow stir up drama.
Analogous Colors Shades positioned next to each other feel harmonious, blue seamlessly merges with purple and red naturally commingles with orange. Such combinations evoke tranquility and unity.
Monochromatic Schemes Incorporating different shades of the same color produces refined pieces. Light blues with navy hint at oceanic visuals, while a range of greens can suggest forest landscapes.
Addressing Common Issues
Even seasoned artists sometimes grapple with challenges inherent to paint pouring techniques. Here are some solutions to common setbacks that might demoralize beginners.
Paint Won't Flow Smoothly Most likely your blend is too thick, gradually add more medium. Test consistency prior to pouring. Aim for a honey-like flow.
Colors Become Muddy This occurs when too many hues amalgamate. Use fewer colors for each pour. Allow each layer to dry prior to adding the next one. Minimalism often thrives in paint pouring art.
Paint Cracks When Drying Your paint has been applied too heavily. Dilute your mixture more next time and use a proper pouring medium as opposed to mere water. Ensure consistent room temperature during drying.
Advanced Techniques to Experiment With
Once you get acquainted with basic pouring, these advanced methods can usher in new dimensions to your art. Each technique results in varying visual effects and textures.
String Pulling Dip a string in paint and sweep it across wet areas to render fine linear specifics. Use contrasting shades for maximum impact. Practice on paper first.
Blow Dryer Manipulation Employ a hair dryer on cool settings to push paint around. It helps to create organic, flowing formations. Act swiftly before the paint starts solidifying. This technique injects movement and fervor into your piece.
Masking for Pristine Lines Apply tape to shape geometric designs within the flowing paint. While the paint is slightly wet, remove the tape, combining the natural flows with sharp, clean margins.
Finalizing and Shielding Your Artwork
Your admirable paint pouring art mandates proper finalization. Adopt these steps to ensure your masterpiece's longevity.
Let your piece dry totally flat, preventing further flowing of paint. Depending on thickness, the drying span is typically 24-48 hours. Be patient, as haste can ruin the outcome.
Protective Finishing: 1. Initially apply an isolation coat 2. Adhere a removable varnish on top 3. Opt for a matte or glossy finish 4. Abide by the manufacturer's guidelines meticulously
Consider capturing pictures of your work at various stages. The wet paint often diverges in appearance from the dry result. These photos assist you in learning and refining your technique.
Showcasing Your Paint Pouring Masterpieces
Place your completed pieces in a compelling presentation. Suitable framing and display augment the impact of flowing hues and organic designs.
Float mounting is apt for paint pouring art. The technique lays bare the entire painted surface, underscoring the organic boundaries that render each piece unique.
Proffering multiple pieces together is worth considering. A series of paint pouring artworks forge influential visual implications. Incorporating diverse sizes conduces dynamic wall arrangements, captivating viewers.
Effective lighting amplifies color vibrancy. Shun direct sunlight that could fade pigments. LED spotlights accentuate subtle color differences and flowing textures exquisitely.
Nurturing Your Paint Pouring Art Practice
As with any skill, proficiency in paint pouring art is honed via regular practice. Establish a dedicated workspace where you can freely and actively experiment.
Maintain detailed records of successful color blends. Document successful paint ratios and environmental conditions such as temperature and humidity. This information aids in reproducing successful outcomes.
Join interactive online communities of fellow pour painting artists. Exhibit your work and learn from shared experiences. The collaborative support and inspiration from fellow artists hasten your artistic journey.
Embrace above all the unpredictable essence of this art form. Every pour presents a novel lesson. Even so-called “failures” often harbor aesthetically pleasing elements worth cherishing.
Paint pouring art opens endless avenues for creative articulation. Commence with the basic techniques and progressively sharpen your skills. Remember, there are no errors, only fortuitous surprises leading to beautiful revelations.