Marbling Paint Effects: Easy Water Surface Painting Guide
Effortless Guide to Marbling Paint Effects: Paint on Water
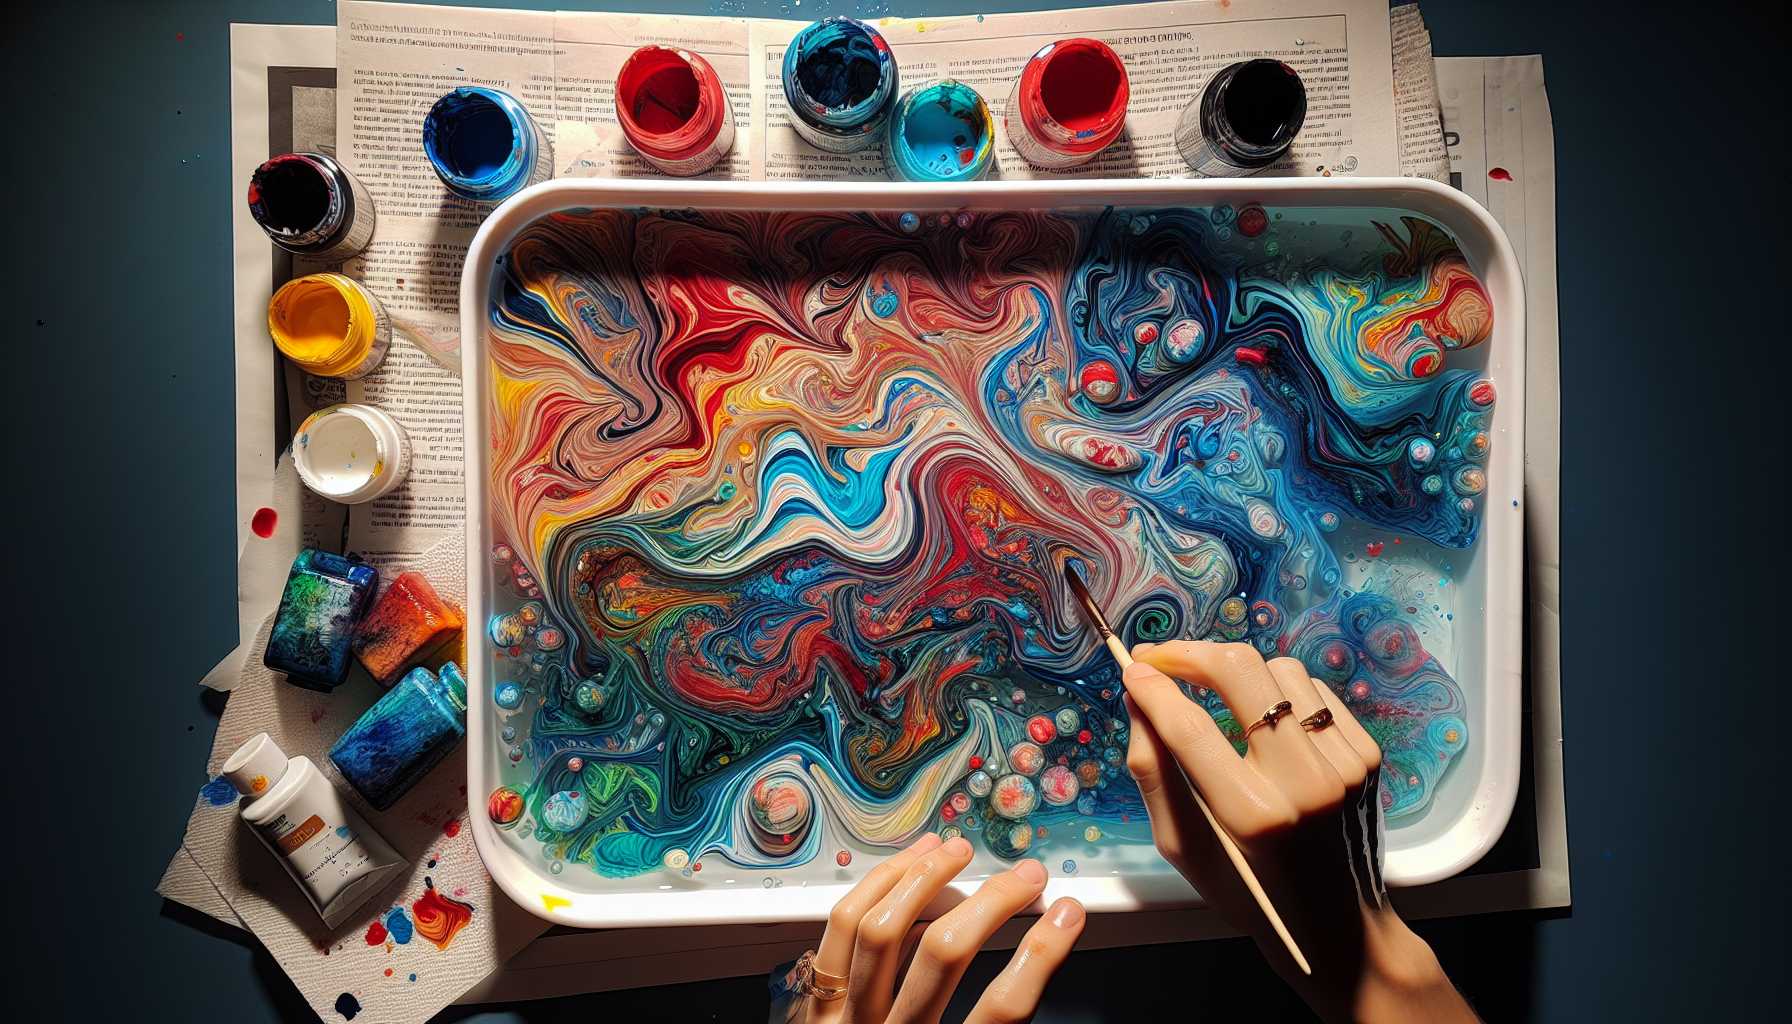
Have you ever observed how paint dances on water? It's pure magic! Marbling paint effects create remarkable, individual pieces of art that seem far more complex than they are in reality.
I've enjoyed exploring water marbling for many years. Believe me, once you attempt it, it's difficult to resist this enchanting art form.
What Exactly Are Marbling Paint Effects?
Marbling is a time-honored art technique where paint is floated on water, allowing the colors to swirl and merge naturally. This eye-catching pattern is then transferred onto paper or fabric.
Every outcome is unique. No two pieces ever appear entirely the same, which is the true charm of marbling!
Essentials You'll Need
Getting started is a breeze. You likely already have most of the required materials at home.
Fundamental Supplies
- A large, shallow container (like a baking tray)
- Acrylic paints
- Water
- Paper or fabric
- Toothpicks or skewers
- Newspaper for tidying up
Optional Additions
- Liquid starch or shaving cream
- Eye droppers
- Combs for setting patterns
- A spray bottle
Setting up Your Workspace for Marbling
To begin, locate a well-ventilated space. Marbling can be a bit messy, so protect your workstation with newspaper.
Fill your container with about 2 inches of water, ideally at room temperature. Extremes of heat or cold can impact the paint's behaviour.
Arrange your materials for easy access. Once the process starts, you'll appreciate having everything within reach.
Basic Water Marbling Method
Ready to create your first artwork? Let's jump right in!
Step 1: Introduce Your Paint
Drop small quantities of acrylic paint onto the water's surface. The paint should float, not sink. If it starts to sink, dilute it slightly with water.
Initiate with 2-3 colors. More colors can be experimented with later.
Step 2: Design Your Pattern
Use a toothpick to gently drag through the paint. Experiment with different movements, like straight lines, circles, figure-eights, or random swirls.
Observe as colors meld and move in harmony. It's genuinely soothing!
Step 3: Transfer the Pattern
Gently lay your paper on the water. Initiate from one corner and gently lower it, ensuring air bubbles are avoided.
Count to three, then carefully lift the paper straight upwards. Voila! You've crafted your first piece of marbled artwork.
Advanced Marbling Techniques
Once you've mastered the basics, consider these fun variations.
Marbling with Shaving Cream
Instead of water, try shaving cream for distinct effects. The cream holds patterns longer, providing more time for intricate designs.
Spread shaving cream in your container before adding paint drops. Craft patterns with your tools. Press paper onto the surface and then remove excess cream.
Liquid Starch Technique
Combine equal quantities of water and liquid starch to thicken the mixture, which slows down the paint creating varied textures.
This technique is also suitable for fabric marbling.
Marbling with Oil-Based Paint
Try combining oil-based paints with turpentine to create entirely different effects as the paint interacts differently with water.
Always ensure good ventilation when working with oil-based materials.
Expert Advice for Superior Results
Want to elevate your marbling techniques? Here are some top tips and tricks to achieve better effects.
Importance of Paint Consistency
Thin paints spread further, whereas thicker paints maintain their form. Experiment until you discover your preference.
Add a few droplets of water to acrylic paint if required. Mix gently to avoid the formation of bubbles.
Controlling Temperature
Warm water accelerates paint spread; cold water slows it down. Utilize temperature to control your design.
Workspace Maintenance
Ensure water is clean between projects as leftover paint can influence new designs. A fresh start promises the best outcomes.
Optimal Timing
Requires quick work once initiated, as thin films form on the water over time. Fresh paint results in freer movement.
Imaginative Project Ideas
Marbling offers limitless artistic possibilities. Here are some engaging projects to try.
Personalized Greeting Cards
Design unique birthday cards or thank-you notes. Trim the marbled paper to the desired size and add a simple message.
Customized Book Covers
Create bespoke notebook covers. Marbled designs deliver an impressively professional look.
Fabric Crafts
Try marbling cotton fabric to create scarves, pillowcases, or tote bags. Heat-set the paint when complete.
Seasonal Decorations
Create marbled ornaments or gift wrap using seasonal colors- the outcomes can be stunning.
Overcoming Common Hurdles
Don't worry if things don't go smoothly initially. Here are some solutions to typical problems.
Paint Sinks Instead of Floating
If your paint is too dense, gradually thin it with water. Always trial this on a small area first.
The Outcome Looks Muddy
If mixing colors excessively, reduce the number of colors or blend more gently. Simplicity often works best.
Patterns Dissolve Too Swiftly
Your water may be too warm. Try cooler water or work more quickly once paint is added.
Paper Rips or Becomes Wrinkled
Gently lower the paper starting from one side. Maintain steady pressure.
Caring for Your Marbled Artwork
Proper care ensures longevity of your artwork.
Drying
Lay pieces flat to dry thoroughly. This prevents warping and guarantees uniform drying.
Storage
Store flat between acid-free papers. Avoid folding or rolling if possible.
Display
Frame your best pieces. Marbled art looks stunning in a matt frame.
Safety Precautions
Always ensure proper ventilation, as some paints and solvents emit potent fumes.
Wear old clothing or an apron as paint splashes are unavoidable.
Ensure materials are out of reach of children and pets. Always clean up any spills immediately.
Dispose responsibly of paint water. Clearly, it should not be poured down drains.
Playing Around with Colors
Color choice dramatically impacts the final piece. Here are some tips for choosing winning combinations.
Complementary Colors
Opposite colors on the color wheel provide dynamic contrast. For starters, try blue and orange, or red and green.
Analogous Colors
Close colors blend beautifully. Consider blues and greens or reds and oranges.
Monochromatic Themes
Different shades of a singular color create subtle, elegant results.
Metallic Accents
Add gold or silver paint for a luxurious touch. Use sparingly for the best effect.
Enhancing Your Marbling Skills
Like any art form, the best way to improve marbling is through practice. Start simply and slowly introduce new methods.
Online communities and local art groups are excellent resources. Other artists also often provide inspiration and useful tips.
Maintain a record of your attempts. Photograph successful techniques and make a note of what worked-and what didn't.
Above all else, have fun! Marbling should be a soothing and enjoyable experience.
Final Thoughts
Marbling, with its endless creative possibilities, is a forgiving and always surprising technique.
Begin with basic supplies and simple patterns, then, as confidence grows, experiment with new techniques and materials.
Remember, there are no mistakes in marbling, only unexpected outcomes that result in unique art.
Are you ready to embark on your marbling adventure? Gather your supplies and get started. Your first masterpiece is just a swirl away!
The beauty of marbling lies in its unpredictability. Embrace the process and revel in crafting something truly unique.