Easy Paint Dabbing: Simple Texture Effects Guide
A Complete Guide to Easy Paint Dabbing: Enhancing Texture
Ever glanced at a textured wall and wondered how that effect was achieved? It's quite possible that the technique used was paint dabbing, a simple and fun method that can turn a flat surface into something remarkable.
I have spent years assisting homeowners in achieving impressive textured finishes. Today, I'll share the ins and outs of paint dabbing. I assure you it's less complicated than it appears.
Paint Dabbing: What is it?
Paint dabbing is a technique used in decorative painting that generates texture and visual appeal. The process involves pressing a paint-loaded tool onto the surface repeatedly, resulting in a beautifully textured and three-dimensional finish that brings charm to any room.
This enjoyable method can be applied to walls, furniture, and even craft projects. Its striking feature is that it's ideal for beginners as mistakes blend in flawlessly. Each dab makes a unique pattern that blends harmoniously with the others.
Necessary Tools for Paint Dabbing
Intimidating or expensive tools aren't required to begin your paint dabbing journey. Here's a list of things you will need:
- Natural sea sponge (the most commonly used)
- Paint rollers with a thick nap
- Crumpled plastic bags
- Cheesecloth or rags
- Paper towels
- Paint brushes for retouch
Almost any textured material can be employed to create stunning effects in this technique, giving you an array of choices from bubble wrap to even leaves.
Making the Right Paint Selection
Your paint choice could either make or mar your dabbing project. Here's what suits best:
Base coat: An excellent quality of primer or paint in a lighter shade will serve as an excellent base for your textured layer.
Top coat: Pick a paint that is one to three shades darker or lighter than your base. Eggshell or satin finishes are wonderful for dabbing.
Paint consistency: Thin the paint you will use for dabbing a little with water (just about 10-20%). This gives a softer texture that appears more natural.
Process of Paint Dabbing: Step by Step
Here is my walkthrough for the basic dabbing approach:
Preparing Your Surface
Thoroughly clean your wall and apply primer where needed. Let it dry completely. Cover the surrounding floors and furniture with drop cloths to protect them from flying paint droplets, as dabbing can be a messy process.
Applying Your Base Coat
Cover your whole surface uniformly with your base color using a regular roller. Allow this to dry for a minimum of four hours, although sometimes overnight drying may be necessary.
Preparing Your Dabbing Tool
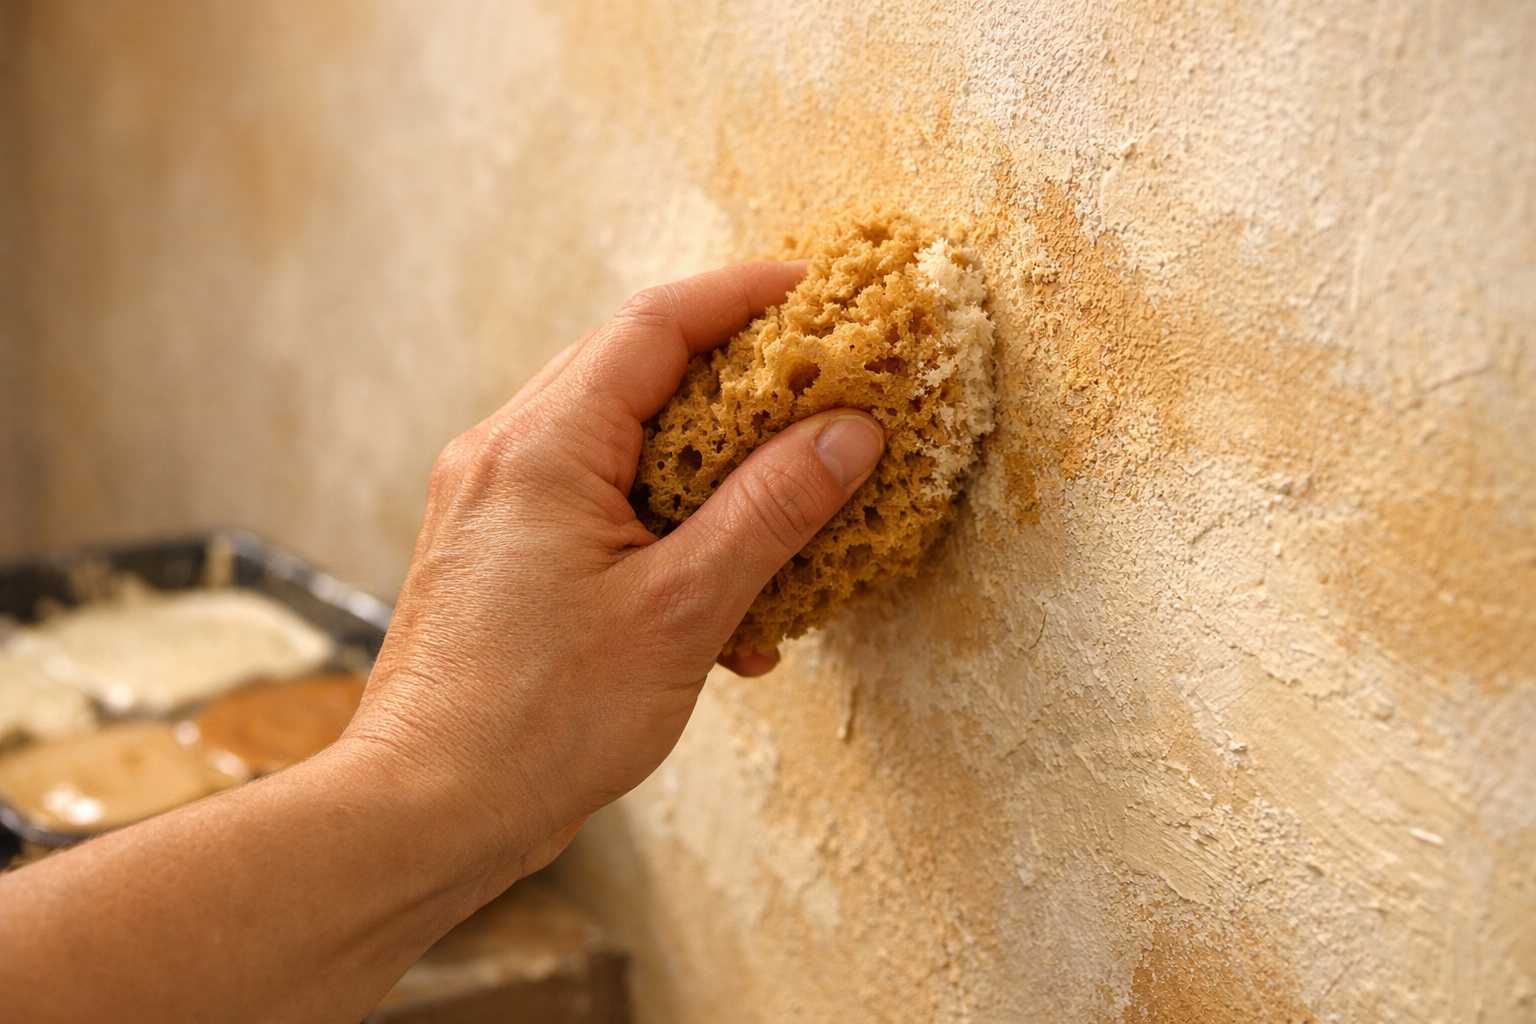
Pour the paint you're using for dabbing into a paint tray, lightly dip your sponge or your preferred tool into the paint, and run it along the ridged section of your tray to remove the excess. The tool should be damp but not dripping.
Dab Away
Press your loaded tool against the wall, lifting directly upwards - avoid dragging or twisting. Move to the spot next to the previous one and continue the process. Overlapping your dabs aids in natural blending.
It is beneficial to work in small sections of about 3 feet square. This keeps the paint manageable and prevents obvious seams.
Techniques and Effects in Dabbing
Different tools and methodologies yield unique outcomes. Here are a few popular morphologies:
Traditional Sponge Dabbing
Natural sea sponges are commonly used and give an organic, cloud-like pattern due to its irregular holes. It's an excellent choice for living rooms or bedrooms. Start with gentle pressure and gradually intensify, as it is easier to add texture than to remove it.
Dabbing with Color Washing
Create a sophisticated look with two or three related colors. Apply your lightest shade first, then dab on the medium and dark tones while the first is still mildly wet. This results in a stunning depth and movement effect, perfect for dining rooms and entrances.
Geometric Dabbing
Make use of cut sponges or stamps for regular patterns. It is perfect for modern spaces or kids' rooms. Consistency in spacing gives the best results.
Common Blunders to Sidestep
Despite its forgiving nature, there are still some slip-ups that can hamper your results:
Overloading your tool: A dab cloaked in excessive paint engenders heavy and unnatural looking dabs. Err on the side of less paint in dabbing.
Racing against time: Don't hurry. Take regular breaks to spot areas needing more or fewer textures.
Overlooking the edges: Corners and edges are as essential as any part of your wall. Use a small brush or a torn piece of sponge for detailed areas.
Uneven pressure: Attempt to maintain a similar pressure throughout. If you're feeling apprehensive, practice first on cardboard.
Successful Color Mixes
Selecting colors can be daunting. Here are some winning combinations:
Warm neutrals: A cream base with soft tan dabbing results in cozy, inviting spaces.
Cool blues: A light blue base coupled with deeper navy dabbing is excellent for bathrooms.
Earth tones: A beige base coupled with brown and gold dabbing creates a classy aura.
Monochromatic: Different shades of the same color bring about subtle and elegant effects.
Looking After Your Dabbed Surfaces
With due maintenance, dabbed walls can look amazing for years. Simply dust lightly with the soft brush attachment on your vacuum. For spot cleaning, use mild soap and water with a soft cloth. Try to avoid intense scrubbing that might harm the texture.
Touch-ups are surprisingly straightforward. Have some dabbing paint and tools at the ready. This will allow you to replicate the dabbing technique in small areas as required.
Troubleshooting Common Problems
Sometimes things may not proceed as planned. If that is the case, here are some remedies for common problems:
Too heavy texture: If your texture is too thick, brush over these areas lightly with a dry brush while the paint is wet. This will soften dominant spots.
Uneven coverage: Add more dabs to sparse spots. Blend the edges cautiously with gentle touches.
Inaccurate color: Don't fret! It's usually possible to fix color issues by dabbing with a corrective shade over the problem areas.
Advancing Your Skills
After you've mastered basic dabbing, try these advanced methods:
Layered dabbing: Apply multiple thin layers of different colors. This results in incredible depth and richness.
Combination methods: Combine dabbing with other faux finishes like color washing or ragging.
Furniture dabbing: Revamp old furniture with the dabbing technique. It's perfect for hiding blemishes.
Conclusion: Thoughts on Paint Dabbing
Paint dabbing offers a multitude of possibilities for creative expression in your home. It's an affordable way to add a touch of luxury and character to any room. This method is ideal for DIY enthusiasts across all skill levels due to its forgiving nature.
Remember that practice makes perfect. Don't hesitate to experiment with different tools and colors. Each project will enhance your understanding of this versatile technique.
You can begin small with an accent wall or a powder room. Once you realize how simple and rewarding the process can be, you’ll be thrilled to extend it to other areas of your home.
The most thrilling aspect of paint dabbing? No two projects exactly mirror each other. Your textured walls will be as unique as you are. So, get your sponge and start bringing your creativity to life!