Beginner's Guide to Textured Paint Effects Using Household Items
A Beginner's Guide: Create Textured Paint Effects Using Everyday Household Items
Looking to jazz up your wall décor without spending a fortune? You've come to the right place! Crafting gorgeous textured paint effects doesn't need expert skills or costly tools.
In fact, some of the most captivating texture effects are the result of utilizing items you already have around your home. So, prepare to explore the exciting world of do-it-yourself (DIY) wall art with us.
Why Opt For Textured Paint Effects?
Giving walls a textured finish can add a unique character and depth to the room. Not only do they mask wall imperfections well, but they also bring a level of visual appeal that flat paint cannot replicate.
The cherry on top? You don't have to hire a professional. With a little bit of creativity and some everyday household items, you can produce dazzling results yourself.
Gathering Your Fundamental Supplies
Let's start by assembling these basic supplies:
- High-quality paint (base color and accent colors)
- Paint rollers and brushes
- Old bed sheets or drop cloths
- Painter's tape
- A paint tray
Don't feel anxious about specific texture tools yet. We'll make use of what you already have!
Preparing Your Canvas
Begin with a thorough cleaning of your walls. Remove any peeling paint or debris and if necessary, apply spackling paste to small holes.
Use painter's tape to mark out trim, outlets, and anything else you want to keep paint-free. Spread out drop cloths to safeguard your floors. Proper preparation makes a significant difference to your end product.
Apply your base coat evenly and ensure it's thoroughly dried before adding texture. This usually takes 2-4 hours, depending on humidity and temperature.
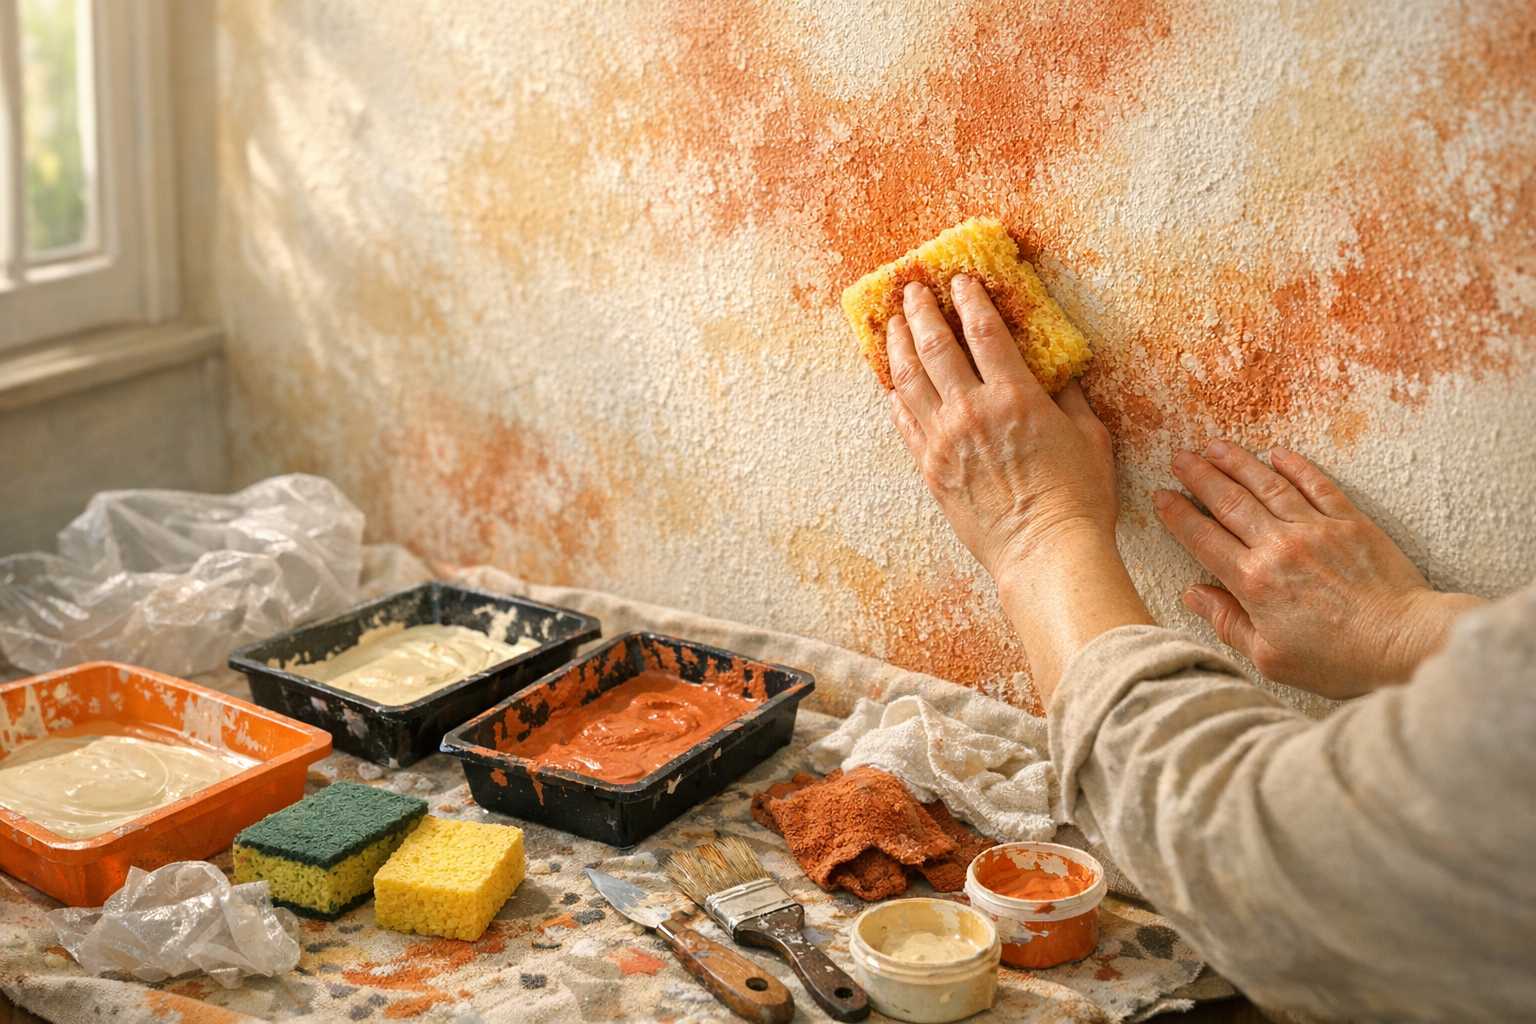
Sponge Texturing Technique
Sea sponges are ideal for this technique, but you can also use regular kitchen sponges. Ensure they're clean and slightly damp.
Lightly dip your sponge in paint and blot off excess on paper. Then dab the sponge randomly across your wall.
By rotating your wrist as you work, you prevent creating repetitive patterns. Layer different colors for more depth and interest.
The technique requires light pressure and random movements. Practice on a piece of cardboard first if you're feeling uncertain.
Rag Rolling Method
Old t-shirts or any cotton cloth work well for this technique.
Dip your chosen fabric in paint, wringing out any excess. Hold the cloth loosely in your hands and roll it across the wall in varying directions.
The key here is to change the shape of your rag frequently as this creates diverse patterns and prevents uniformity. Work in small areas while the paint is still wet.
This method looks exceptionally good over dark base colors with lighter accent colors.
Brush Stippling Effects
Old paintbrushes are the tools of choice. Firm bristles work better than softer ones.
Load the brush with paint, then blot most of it off. Gently tap or stipple the brush against the wall.
Varying your pressure and angle while overlapping your marks sporadically enhances your texture. Keep your brush clean to prevent paint buildup which can tarnish the effect.
Plastic Bag Technique
Grocery bags work perfectly for this technique. Crumple the bag into a circular shape.
After a light dip in paint, gently press the bag against the wall before smoothly lifting it up. Avoid dragging or twisting the bag.
Continually reshaping the bag prevents a repetitive pattern. This method is best carried out quickly while the base coat remains partially tacky.
This technique creates beautiful, cloud-like effects suitable for bedrooms and living rooms.
Comb and Fork Patterns
Kitchen tools, such as wide-toothed combs and forks, can make excellent texture tools.
Drag these utensils through wet paint to create linear designs, try various movements such as waves, straight lines, or crosshatching.
Clean your tools regularly to avoid the paint buildup that can spoil crisp lines. Work in reasonable sections to maintain wet edges.
This method suits accent walls or smaller spaces beautifully.
Paper Towel Textures
Crumpled paper towels can create soft, understated textures, making them perfect for beginners who want subtle effects.
Press crumpled towels into wet paint, then cautiously lift them away. Rotate and reshape the towels regularly.
This method is suitable for creating aged or weathered looks. It's also very forgiving of mistakes.
Layer different colors for a more complex, sophisticated result.
Pitfalls to Avoid
Don't overload your tools with paint. With texture techniques, less is always more and too much paint can produce a messy, heavy-looking effect.
Avoid creating repetitive patterns. Make sure to rotate your tools and change your pressure constantly. Natural textures are far from perfectly uniform.
Don't allow sections to dry between applications. Always work systematically to keep edges wet. Dried edges will show as clear lines in your finished work.
Ensure to take regular breaks when you need them, as tired arms can lead to inconsistent results.
Successful Color Combinations
Light colors applied over darker bases produce a dramatic contrast. Try cream over deep blue or gold over burgundy.
Similarly, using different shades of the same color can yield subtle sophistication. For example, light gray over charcoal or peach over coral.
Metallic accents can add a touch of glamour to any texture technique. Use them sparingly for the best results.
Always test color combinations on sample boards first. Something that looks good in your mind may not translate well to the wall.
Tips on Finishing and Maintenance
Allow your textured paint effect to completely cure before cleaning it. This usually takes several days, not just hours.
Gently dust textured surfaces with soft brushes. Avoid aggressive scrubbing that might damage your work.
Touch-ups on textured surfaces can be a challenging task so, always keep a bit of extra paint and practice your technique for future repairs.
Consider applying a clear protective layer to high-traffic areas. This procedure facilitates cleaning in the long run.
Creative Ideas for Different Rooms
For bathrooms, consider subtle sponge techniques using moisture-resistant paint. It's best to avoid heavy textures that can capture humidity.
Living rooms can accommodate bolder styles such as rag rolling or brush stippling as these areas are the perfect space for a creative showpiece.
Bedrooms are best suited for calm, gentle atmospheres which are ideally created using soft paper towel techniques.
Accent walls are a fantastic opportunity to experiment with dramatic techniques without overwhelming the room.
Addressing Common Issues
If your texture appears too heavy, gently smooth it out using a clean, damp sponge while the paint is still wet.
Uneven coverage is often related to uneven pressure or inconsistent paint application. Practice maintaining a steady hand.
Visible seams between sections usually imply edges being allowed to dry. Aim to work more swiftly or consider getting assistance.
Remember, there's no need for panic if something seems to turn out wrong. Most texture mistakes can easily be painted over once dry.
Enhancing Your Skills
Once you're comfortable with basic techniques, consider combining different methods. For instance, layer sponging over rag rolling for complex effects.
Try experimenting with stencils over textured backgrounds. This procedure introduces an additional dimension to your design.
Faux finishing techniques like color washing or glazing can be applied over your textures.
It's always a good idea to document successful techniques with photos and notes. It helps you to recreate favorite effects later.
Wrapping Up
Crafting attractive textured paint effects using everyday items is less daunting than you might suppose. Start with basic techniques and gradually build your confidence.
Remember, texture thrives on imperfection. Don't stress about achieving perfection.
But most importantly, enjoy the process! Your walls will exhibit your individuality and creativity in a manner that generic, store-bought decorations cannot rival.
With persistent practice and patience, you'll be creating remarkable textured surfaces that are sure to impress for years to come.