Dutch Pour Technique: Complete Fluid Art Guide
Mastering the Dutch Pouring Technique: Full Guide to Fluid Artistry
Ever marveled at the magical ballet of colors gracefully flowing across a painting? Perhaps you've witnessed the captivating allure of the Dutch pour technique. This method in fluid artistry conjures eye-catching, organic designs reminiscent of flowing rivers and windswept terrains.
With years of experience experimenting with Dutch pours, I'm thrilled to share all the insights and tricks I’ve acquired. Let’s traverse this enchanting medium of expression together!
Understanding the Dutch Pour Technique
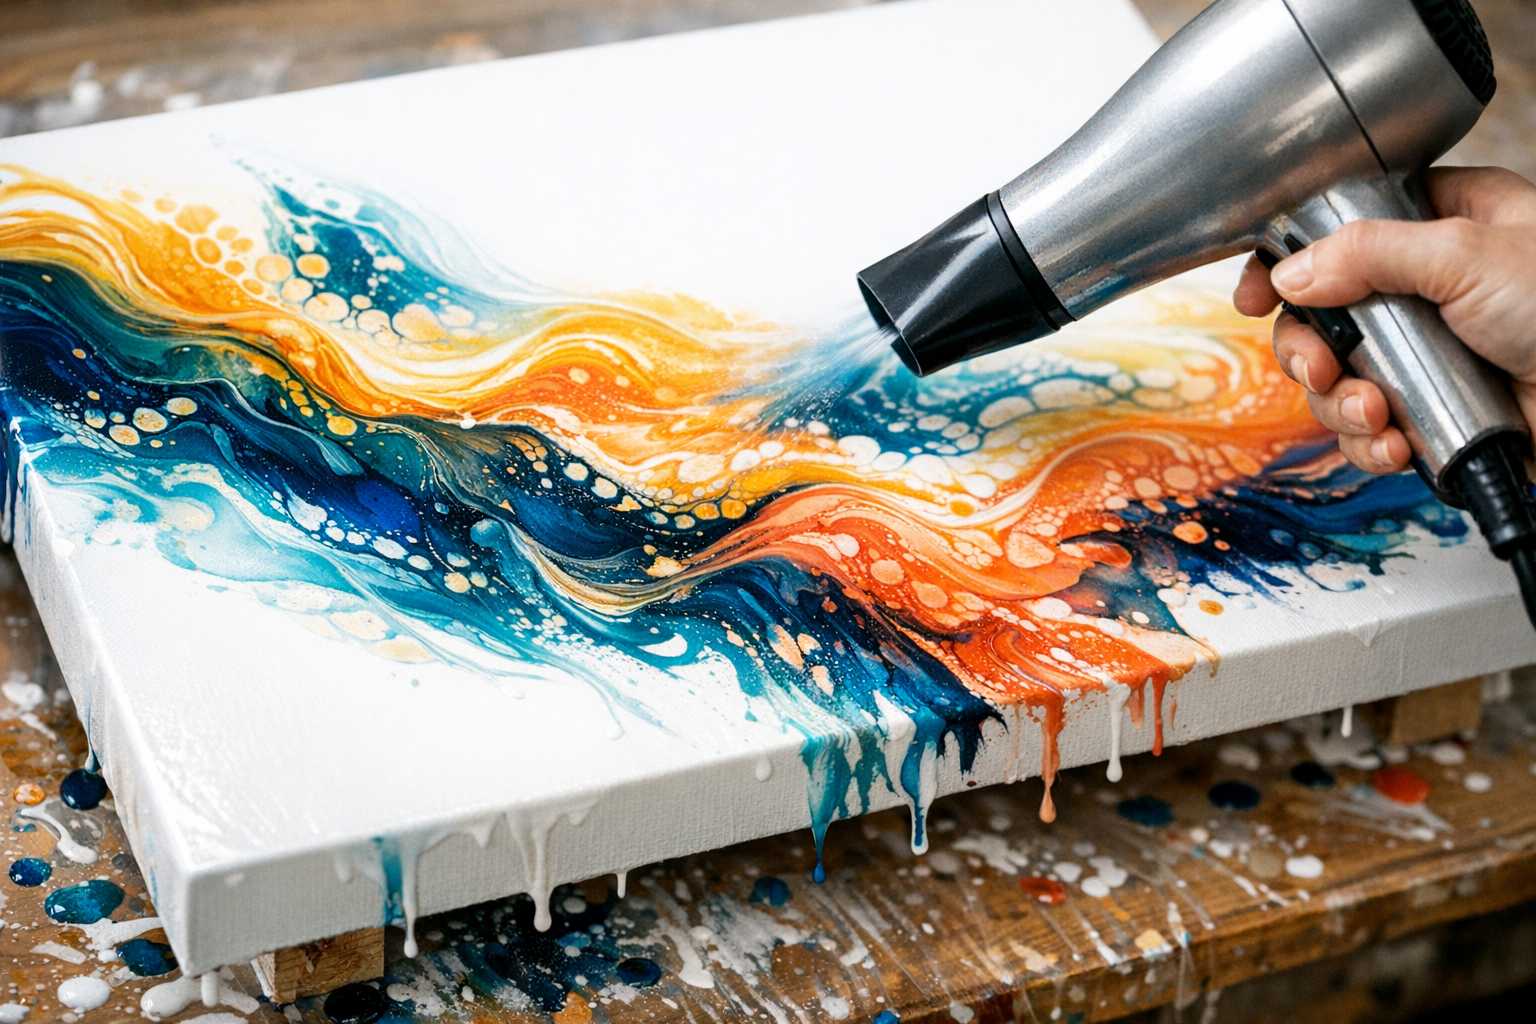
Pioneered in Holland, the Dutch pour technique enlivens your artistry by using a blow dryer or heat gun to spread moist paint over the canvas. Contrary to other pouring techniques, this method allows you to actively dictate the paint’s flow using controlled airflow.
This clever technique allows artists to create gorgeous natural patterns, resembling wave structures, cloud formations, or tree branches in wet acrylic paint. The beauty of the Dutch pour lies in the creative control it offers; you are not just giving gravity the reins but actively shaping the final design.
Crucial Tools for the Dutch Pour Technique
Initiating this hobby doesn’t necessitate fancy equipment. Here's a simple checklist for your first Dutch pour:
Paint and Medium
- Acrylic paints (starters can make do with student grade)
- Pouring medium or alternate mixing solutions
- Distilled water to thin the mixture
Essential Supplies
- A blow dryer or heat gun
- Canvas or alternative painting surface
- Plastic cups for mixing
- Stirring tools
- Gloves (fair warning, it gets rather messy!)
- Plastic tablecloth or newspapers
Optional Add-Ons
- Silicone oil for cellular structures
- Isopropyl alcohol in a spray container
- Palette knife
Remember, it's okay if you don't have all these items available at once. Take your time to gather these supplies, many of which you likely already have at home.
Getting Your Dutch Pour Paint Ready
Ensuring the right consistency in your paint is pivotal. Your paint should mimic the flow of warm honey. Too viscous, and it won't flow adequately, too diluted, and colors might blend indistinctly.
Start by blending your acrylic paint with a pouring medium. Generally, a 1:1 ratio works, but this could vary based on the brand of your paint. Add minuscule amounts of distilled water as needed.
Check the consistency by lifting your stirring instrument. Properly mixed paint should flow off in a steady ribbon that dissipates back into the mixture within a few moments.
Remember to mix each color individually. Usually, I opt for 3-5 colors for a single Dutch pour, as too many colors can muddy the results.
Comprehensive Guide to Creating a Dutch Pour
Ready to create your first Dutch pour? Let's journey together:
Step 1: Prepare Your Workspace
Shield your workspace with plastic or newspapers since the paint tends to get everywhere. Elevate your canvas on cups or a rack to allow excess paint to drip freely.
Step 2: Apply Base Colors
Pour your mixed paints directly onto the canvas, creating lines, blobs, or random blotches - no need to strategize. The blow dryer will do most of the work.
Step 3: Blow the Paint
Turn on your blow dryer to low heat, medium speed, and hold it roughly 6 inches away from the canvas. Gently move the paint across the canvas.
Step 4: Carve Patterns
Glide your blow dryer in different directions, aiming either outward from the center or zigzagging from corner to corner. Observe how the colors interact.
Step 5: Add Finer Details
Create texture using short bursts of air. Direct the dryer downward for circular patterns. Tilt it to create sweeping effects.
Step 6: Recognize When to Stop
Resist the temptation to overdo it! Overworking your piece can muddle your colors. Frequently step back to assess your work.
How to Avoid Common Mistakes
A flawless Dutch pour is no easy feat, even for seasoned artists. Here are some typical mishaps I often see:
Overusing Heat
Don’t apply too much heat as it can dry your paint prematurely. Keep the heat levels low to medium; you're aiming to move the paint, not cure it.
Getting the Dryer Too Close
Maintain a gap of at least 4-6 inches between the dryer and the canvas. Being too close creates harsh lines and risks blowing the paint right off the surface.
Undersupply of Paint
Running out of paint amidst a pour can be frustrating. Always mix more than you presume you'll need. Excess paint can come in handy for practice pieces.
Overworking the Piece
Avoid getting carried away. Set a hard limit for 10-15 minutes to create your piece. Many great Dutch pours are often completed swiftly.
Steps to Improve Your Dutch Pour Results
In a pursuit of perfection with Dutch pours? Here are tips that have elevated my work:
Experiment with Tilting Your Canvas
A slight tilt to your canvas might help the paint flow more naturally, avoiding pooling in the middle.
Strategize Your Color Layering
Position lighter colors over darker ones for heightened visibility when fanning the paint.
Opt for Quality Paint When Feasible
While student-grade paint is adequate for learning, superior-quality acrylics render richer, more vibrant outputs.
Practice Your Blow-Drying Technique
Understanding how you control the blow dryer can make all the difference. Slow, regulated movements often work better than brisk, erratic ones.
Track Your Progress Visually
Take photos throughout your process. You might notice that sometimes, the earlier stages appealed more than the final product.
Exciting Variations of the Dutch Pour Technique
Once you're equipped with the basics of Dutch pours, consider exploring these captivating variants:
Directional Flow Alternations
Find excitement in creating flows that venture into various directions and cross over one another instead of moving in a solitary direction.
Masking Techniques
Introduce painter's tape to isolate particular sections. After pouring, peel the tape away for sharp, clean edges.
Dutch Pour Layouts
Allow your initial layer to dry partially before pouring additional paint and continuing to fan it out. This creates intriguing depth and texture.
Negative Space Designs
Leave portions of the canvas paint-free. The contrast between undisturbed canvas and flowing paint can produce stunning effects.
Resolving Issues with Dutch Pours
Encountering issues? No need to fret; all artists face challenges. Here's how to tackle the most common hurdles:
Paint Not Moving
Likely due to thick paint. Incorporate more pouring medium or a dash of water, stir well, and retry.
Muddled Colors
This often happens when you overwork the piece or use an excess of colors. Limit yourself to 3-4 colors for sharper results.
Paint Drying Rapidly
Your workspace might be too warm or dry. Enjoy a cooler room or add a smidge more of pouring medium to slow down drying time.
Sharp Lines Making an Appearance
This typically indicates either the dryer is held too closely or the heat is excessive. Adjust accordingly to maintain the smooth flow.
Perfecting and Safeguarding Your Artwork
Your Dutch pour is not complete immediately after you stop the paint’s movement. Finishing and protecting it correctly ensures its lifespan.
Allow your piece ample time to dry, which could range from 24-48 hours based on paint thickness and environmental humidity. Avoid hurrying this phase!
Once adequately dry, consider applying a protective varnish. I personally recommend an acrylic varnish in a gloss or satin finish to enhance colors and protect paint.
Apply thin, even strokes of varnish. Use a soft brush and ensure each coat is completely dry before adding another layer.
Dutch Pouring: Ideal for Beginners
For those venturing into the realm of fluid art, Dutch pouring is a great entry point. Here's why I recommend this method:
Dutch Pouring offers a higher degree of control than other techniques. Guiding the paint using a hairdryer reduces chances of disappointing outcomes.
The materials needed for Dutch pouring are affordable and widely available. Most of the required tools are probably already in your possession.
Even for novices, the results are often spectacular. The magic of witnessing paint in fluid motion makes most outcomes feel like a success.
The Dutch Pour Technique invites opportunities to enhance skills without squandering materials. Start on smaller canvases or even cardboard to hone your technique.
Further Developing Your Dutch Pour Skills
Ready to level up your Dutch pour skill set? Consider venturing into these areas:
Color Theory
A good grasp of color interaction can dramatically enhance your artistry. Brush up on your knowledge of complementary and analogous color schemes.
Exploring Paint Brands
Acrylic paints from various brands behave differently. Brands like Golden, Liquitex, and their cheaper counterparts each offer unique traits worth discovering.
Experimenting with Different Tools
Consider alternative tools for guiding your paint, like palette knives, straws, or even your breath. These can produce fascinating effects.
Combining Techniques
Try incorporating Dutch pouring with other techniques like stamping, stenciling, or traditional brushwork for a mixed media approach.
Stirring Up Inspiration for Your Next Dutch Pour
Finding yourself stumped about what to create next? Here are some ideas to reignite your creativity:
Nature-Based Themes
Earth tones can create landscapes, while shades of blue and white can craft beautiful seascapes. Combine greens and browns for a forest theme.
Abstract Expressions
No need to represent any particular image. Concentrate on the interplay of colors and movement in the piece.
Seasonal Creations
Craft art aligning with the current season; vivid oranges for an autumn feel or cool blues for a wintry vibe.
Serial Creations
Create multiple pieces using the same color scheme but varied techniques for a cohesive collection.
Closing Thoughts on the Dutch Pour Technique
The Dutch pour technique opens infinite avenues of artistic expression. Every creation is unique, revealing something new each time.
Remember, in the world of Dutch pours, there is no 'perfect'. Each piece bids a new lesson. Embrace the experimental spirit of this art form.
Let’s start simple, remember to be patient with progress, but above all, continue to have fun! The joy of observing paint flow and morph can often be an addictive experience.
Whether you want to create art for stress relief, gifts, or even potential sales, Dutch pouring promises a fulfilling creative journey. All you need now is your blow dryer and paint - your next masterpiece awaits its creation!
So, what will your first Dutch pour look like? Let your imagination run wild—the possibilities are endless.