Easy Paint Drip Art: Creative Techniques for Absolute Beginners
Simple Steps to Master Paint Drip Art: A Guide for Newbies
Hello budding artist! Are you ready to explore the enchanting arena of paint drip art?
Get excited. This enjoyable technique results in striking pieces that give the impression of complexity yet are simple in execution. I can vouch for this— I've witnessed complete novices create breathtakingly beautiful art right away.
The Fascinating Charm of Paint Drip Art
Paint drip art is truly the enchantment of physics at play with you steering the creative reins.
The cherry on the cake? There are no rules! Each drip contributes to a distinct, beautiful piece. It's soothing, invigorating, and incredibly pleasant to see your work of art materialize.
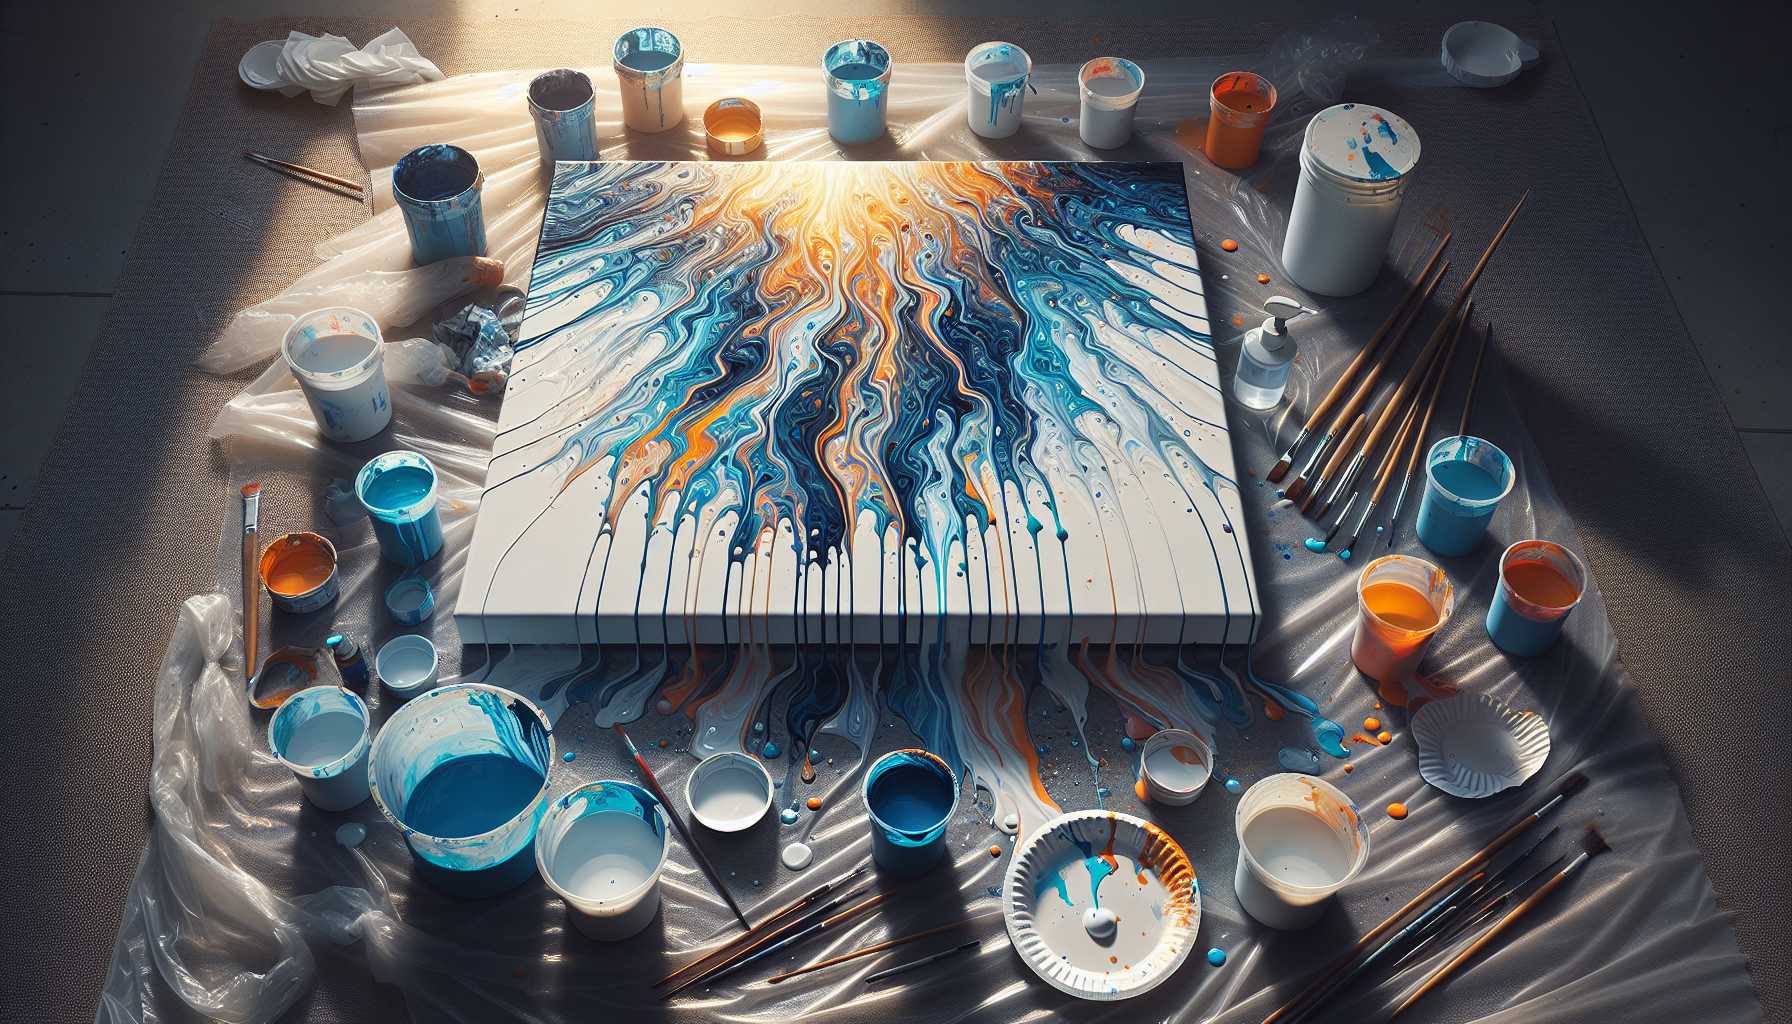
Gathering Your Tools
Let's first assemble all the supplies required. Rest assured, you don't need to splurge.
Basic List for Paint Drip Art:
- Acrylic colors (start with 3-4 shades)
- Canvas or thick paper
- Plastic cups for blending
- Water for diluting paint
- Protective plastic sheets
- Paper towels
- Disposable gloves (trust me, you'll need these!)
Most of these items are likely lying around your house. It's indeed beginner-friendly, isn't it?
Setting Up Like an Expert
Proper setup can spare you from cleaning up for hours on end. Take it from me!
Ensure you cover everything within a six-foot radius with protective sheets or newspapers. Paint has a crafty way of spattering farther than anticipated.
Place your canvas at a minor incline. If you can, place a book underneath one side. This lets the paint flow organically, achieving the desired drip effects.
The Classic Drip Technique
The simplest method is often the best. Sure to leave a lasting impression.
Steps to Follow:
- Dilute your paint with water until its consistency matches that of honey
- Fill your brush amply with paint
- Hold the brush roughly 6 inches above your canvas
- Allow the paint to drip naturally onto the canvas
- Tilt the canvas gently to stimulate the flow
Each drip forms organic shapes that intermingle and merge into a beautiful piece.
Experimenting with Pouring Method for Exquisite Effects
Eager for the next level? The pouring method provides breathtaking, flowing results.
Mix your paint with a greater quantity of water for this method. Aim for the consistency of thick cream.
Directly pour the paint from your cup onto the canvas. Start with one shade, then add more while the first one is still wet. The colors seamlessly blend, forming mesmerizing patterns.
Foolproof Tips for Mixing Colors
Don't fret over this part. I've got some simple and successful color combinations for you.
Options for Newbies:
- Ocean hues: Blue, white, and teal
- Sunset allure: Orange, pink, and yellow
- Forest appeal: Green, brown, and cream
- Bold effect: Black, white, and gold
Start with two shades if choosing seems daunting. You can always mix in more shades later on.
Adding Texture for An Exciting Twist
Fancy making your drip art more dynamic? Let's add interesting textures.
You could use different tools to achieve varying drip effects. A palette knife results in thick, chunky drips. A sponge can cause multiple small drips simultaneously.
You could also sprinkle salt while the paint is wet. It generates enthralling crystalline patterns as it dries. Interesting, isn't it?
Common Errors (And How to Dodge Them)
Every new artist stumbles upon these. The good part? They're straightforward to correct.
Error #1: Thick paint. Your drips become slow and unexciting. Solution: Gradually add more water until you achieve the desired viscosity.
Error #2: Rushing through. Paint drip art demands patience. Allow each layer to flow naturally before adding the next.
Error #3: Overloading on colors. This often results in muddy outcomes. Stick to 2-3 shades when you're just starting.
Finishing and Showcasing Your Masterpiece
Ensure your painting completely dries before handling. This typically takes between one to two days based on the thickness of your paint layers.
Once dry, consider applying a protective varnish. This maintains the vibrancy of your colors and guards against dust and fade.
Consider the lighting when deciding where to display your artwork. With the right illumination, all the delightful textures and color variations in paint drip art shine through.
Enhancing Your Skills
Feeling comfortable with the basics? Here are some tricks for you to try next.
Use metallic paints for stunning effects. Gold and silver drips add a touch of elegance to any piece.
Try masking some areas with tape before starting. Once you peel off the tape, you'll find sharp, clean lines contrasting with the organic drip patterns.
The Therapeutic Power of Paint Drip Art
More than creating attractive pieces, this technique offers phenomenal therapeutic benefits. The recurring movements and focus help calm your mind naturally.
A lot of my students share that they feel more at ease after a paint drip art session. It's akin to meditation, but comes with colorful, tangible results that you can display.
Conclusive Thoughts on Your Artistic Expedition
Paint drip art opens doors to a world brimming with creative prospects. Every piece is unique—no two drip paintings are ever identical.
Don't stress over creating 'perfect' art. The charm of this technique lies in embracing unexpected outcomes and happily accidental results.
Start with the basics and build confidence over time. You'll soon be crafting dazzling pieces that friends and family will be proud to showcase.
Remember, all exceptional artists began with their first piece. Your artistic journey begins with that initial drip. So gather your paints, organize your workspace, and let's create something extraordinary together!
Most importantly, enjoy the process. Paint drip art allows you to let go, experiment, and take pleasure in the creative journey. You're ready for this!