15 Simple Rock Painting Ideas: Complete Beginner's Guide
Gathering Essential Supplies to Start
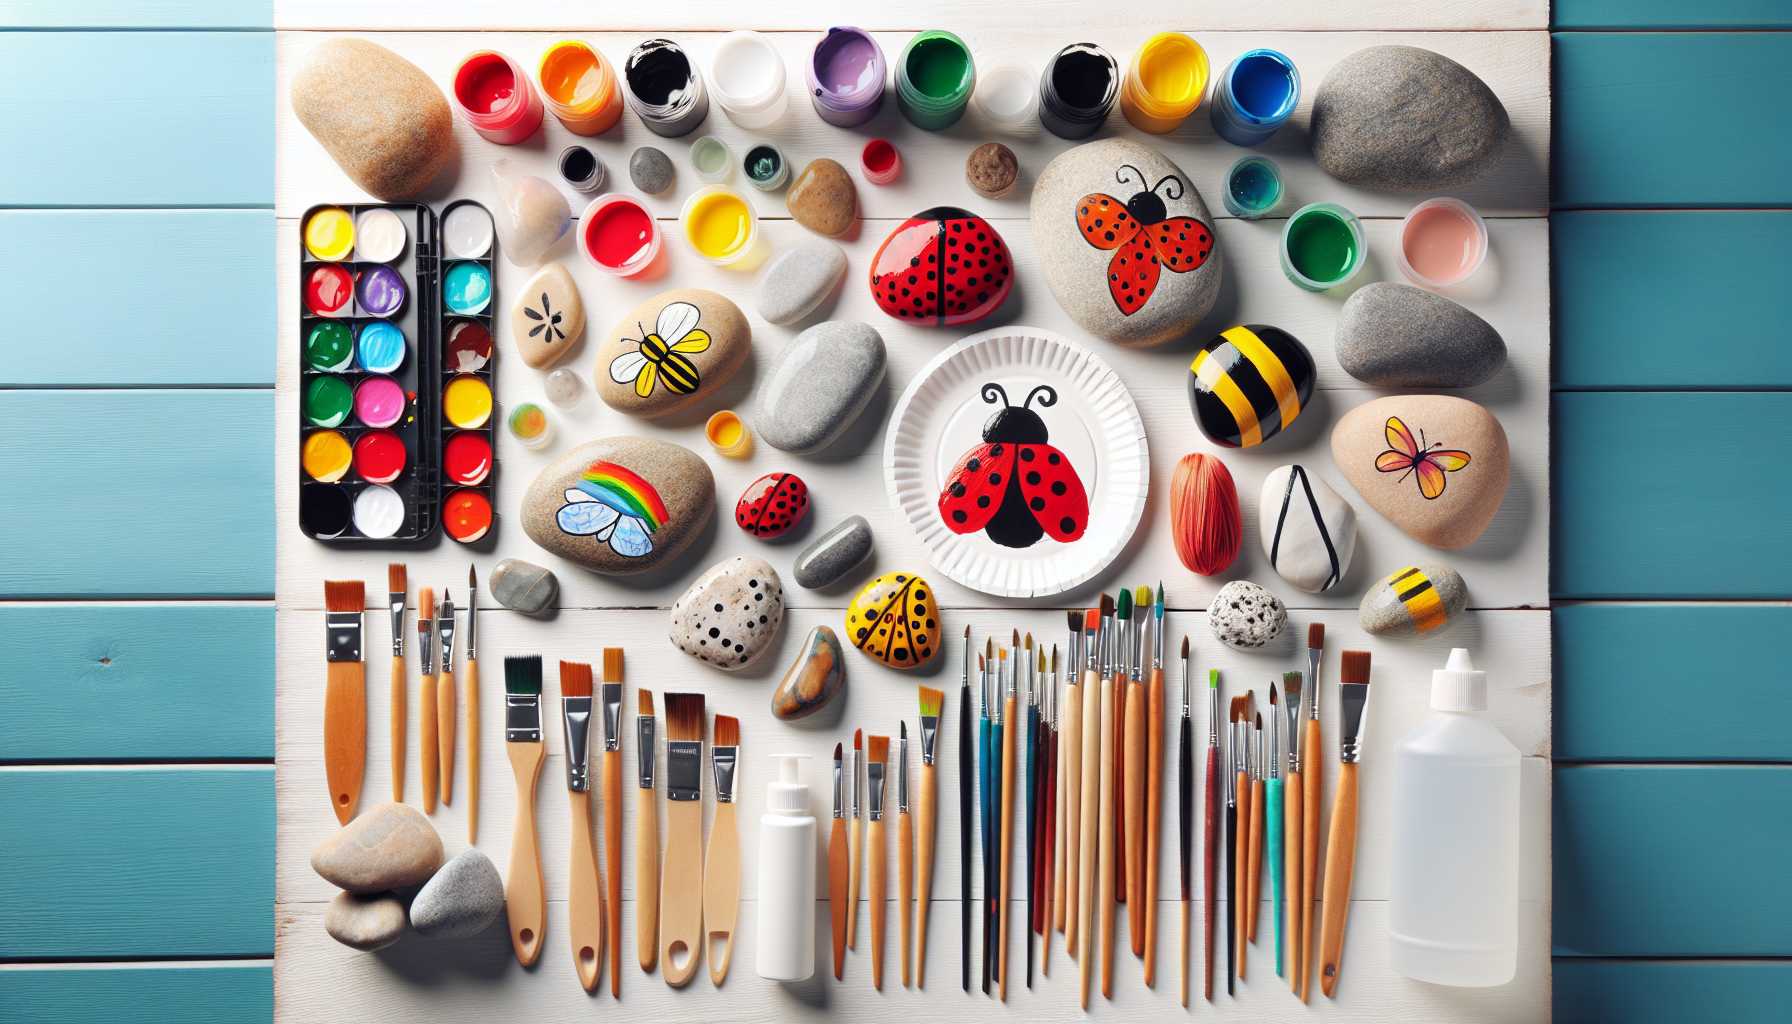
Before we delve into the exciting ideas, it's essential to gather your materials. You'll likely discover that you already have most of the required items in your home.
Here's what you'll need: - Flat, smooth rocks (which can be either collected or purchased from craft stores) - Acrylic paints - Paint brushes (of various sizes) - Black permanent markers - White paint pen - Paper plates (for use as palettes) - Water containers - Paper towels - Clear sealer or mod podge
Top tip: It can be easier to paint rocks that fit comfortably in your palm, especially as a beginner.
Preparing Your Rocks for Painting
It's crucial to work with clean rocks! Give your stones a soapy water wash and make sure they are completely dry before you start painting. By doing so, the paint adheres better, significantly improving the final outcome.
15 Straightforward Rock Painting Ideas to Experiment
Ladybug Rocks
Begin by painting the rock bright red. Add a black line down the center, followed by small dots, and finish with a black head and white eyes. This design is a firm favorite among children!
Mandala Stones
Make a dot in the center and gradually add rings of differently colored dots around it. This relaxing design is great for stress relief.
Rainbow Rocks
Paint horizontal stripes on the rock, following the rainbow sequence: red, orange, yellow, green, blue, and finally purple. You could include white clouds at the ends for a whimsical touch.
Cactus Stones
Green painted oval rocks can be transformed into tiny cacti! Add a few white lines for the spines and smaller flowers on top using pink or yellow.
Ocean Wave Rocks
Create a vivid marine scene with flowing wave patterns using blue and white paints. Blend the colors while they're wet for an authentic oceanic effect.
Owl Rocks
Paint your rock either brown or gray, then add two larger white circles with black centers for the eyes. Fashion feather patterns using darker shades. Owls are surprisingly simple to recreate!
Flower Power Rocks
Form simple daisy shapes with either white or yellow petals, along with green stems and leaves. These vibrant pieces will be a lively addition to a garden.
Galaxy Stones
Begin with a black base. Then, while the paint is still wet, add in purple, blue, and pink paint, blending gently. Once dry, apply white dots to represent stars.
Bee Rocks
Create cute bees by painting yellow rocks with black stripes, small white wings, and black antennae. This design is a fantastic starting point for beginners.
Heart Rocks
A heart is powerful in its simplicity. Paint solid hearts in colors that you love. Adorn with patterns if you like or keep them as they are. These heart rocks can serve as lovely gifts.
Fish Scales Design
Create a mesmerizing scale pattern by painting overlapping semicircles in varying shades of blue and green.
Polka Dot Rocks
Choose a base color and let it dry. Then use the eraser end of a pencil to create flawless polka dots- an easy yet impactful design!
Turtle Rocks
Find a flat, oval rock. Paint it green and add hexagon shapes for the shell pattern. Use a darker shade of green for the head, legs, and tail.
Sunset Rocks
Blend lovely hues of orange, pink, and yellow horizontally across your rock to create a sunset. Adding a black silhouette of mountains or trees for a striking contrast!
Message Rocks
Paint your rock a solid color. Once dry, inscribe motivating words like "Hope," "Love," or "Smile" with a paint pen. A wonderful way to spread positivity!
Useful Tips for Successful Rock Painting
Begin with lighter colors. It's easier to cover light colors with darker ones than vice versa.
Let each layer dry fully. As much as it's tempting to rush, waiting ensures better results.
Keep designs simple at first. Completing each piece will instill confidence.
Don't fret over perfection. What makes rock painting charming is its handmade, unique quality.
Preserving Your Painted Rocks
Protect your art from the elements by sealing it with a clear acrylic sealer once dry, especially if you plan on placing the rocks outdoors.
Make sure the sealer is applied in thin, even coats, drying completely before you apply the next one.
How to Display Your Rock Art
You can brighten up several spaces with your painted rocks: - Gardens and planters - Displayed on bookshelves - On kitchen windowsills - In children's rooms - On office desks
Some enthusiasts even hide their painted rocks around their communities for others to discover. This heartwarming activity is known as "rock hunting".
Overcoming Standard Beginner Hurdles
Is the paint not sticking? The rock might need more thorough cleaning, or a base coat of white paint could help.
Are the colors looking muddled? Make sure you clean your brush between colors and let the layers dry fully.
Do your lines look shaky? As with any skill, practice eventually leads to perfection. Starting with simple shapes and gradually improving to more intricate details can help here.
Advanced Techniques to Explore Later
Once you're comfortable with the basics, you can try: - Dot painting methods - Blending colors to create gradients - Using stencils for flawless shapes - Adding texture using sponges
Making Rock Painting a Family Activity
Rock painting can be an engaging family activity. Children love the creative freedom it offers, and adults find the process surprisingly calming.
You could set up a painting station outdoors for easier cleanup. Let everyone choose their rock and design. You'll be amazed at the creativity it inspires!
Rock Painting on a Budget
Starting this hobby doesn't necessarily mean splurging on materials. A few colors and basic brushes are enough. Many dollar stores carry acrylic paints, great for rock painting.
Free supplies, such as rocks collected from your yard, beach trips, or nature walks, also make this pastime affordable.
Enhancing Your Rock Painting Skills
Start with these 15 basic ideas, then let your imagination run wild. You’ll soon discover your unique style and designs.
Photograph your creations- it's exciting to view your progress over time.
Join online rock painting communities for inspiration and advice. The rock painting world is incredibly welcoming and encouraging.
Final Thoughts on Your Rock Painting Journey
Rock painting holds a unique allure, as it allows you to transform mundane stones into fantastic works of art. The 15 simple ideas provided here form a robust base for you to expand on.
Remember, every artist begins somewhere. Your initial rock might not be perfect, but that's entirely alright. Each decorated rock will teach you something new.
So gather your rocks, prepare your paints, and let your creativity unfold. Your rock painting adventure begins now!
The most important rule? Have fun with it. Rock painting should bring you joy, not stress. Here's to enjoyable painting!