Photorealism in Modern Art: Complete Painting Tutorial
A Complete Guide to Photorealistic Painting in Contemporary Art
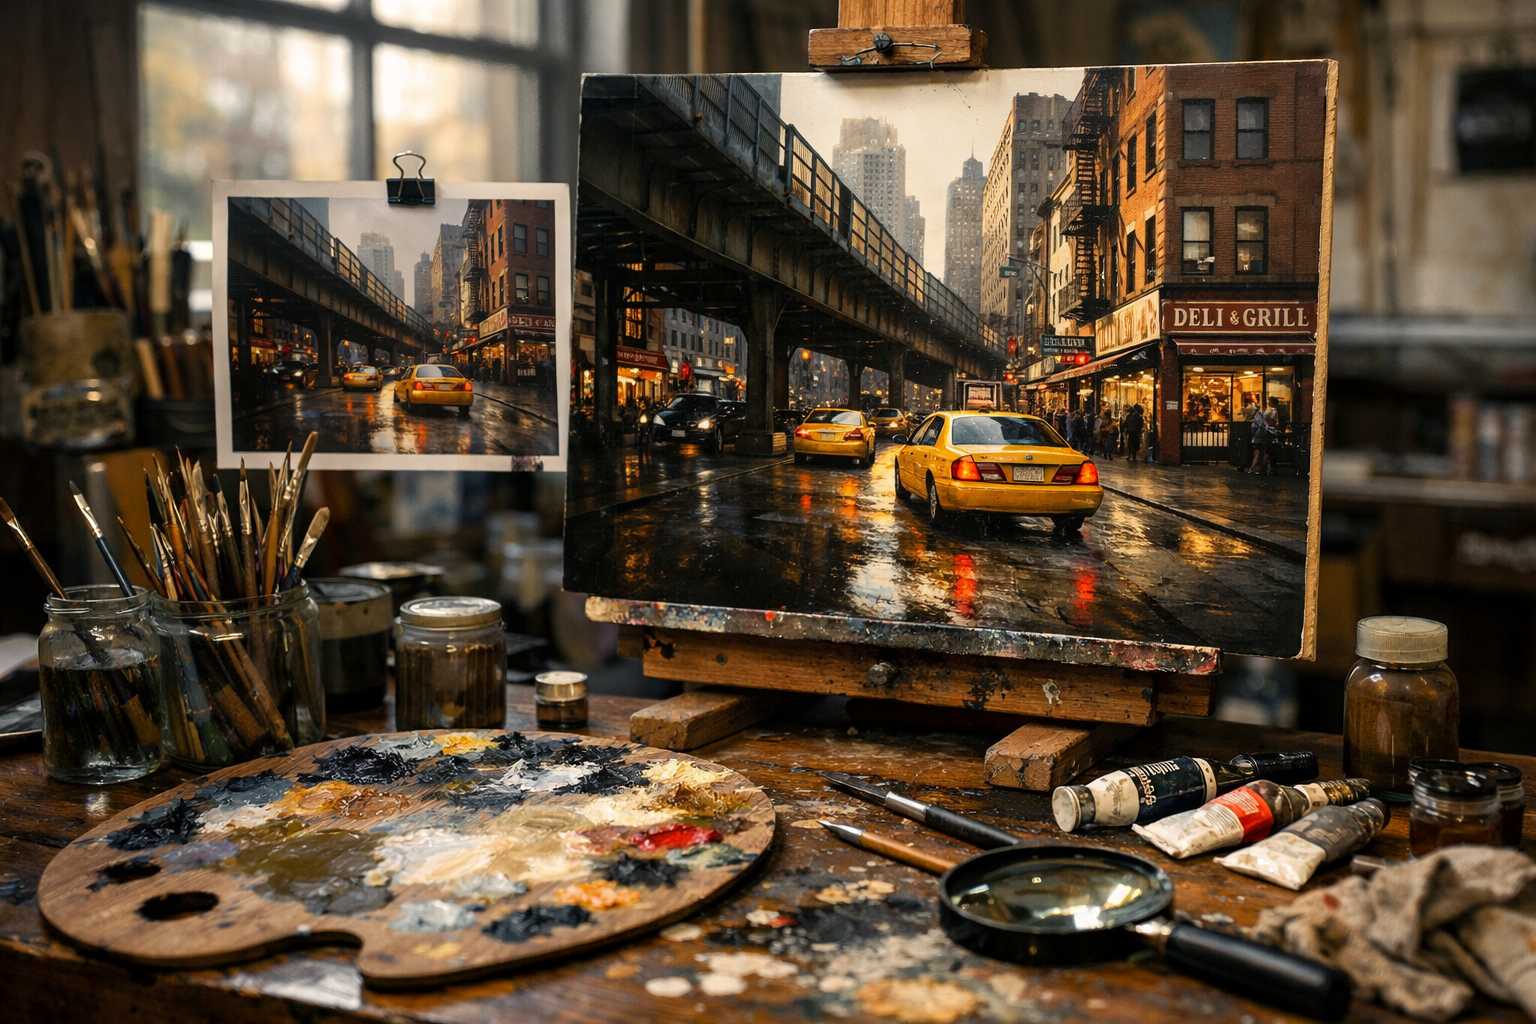
Have you ever stood in awe before a painting that looked almost exactly like a photograph? That's the magic of photorealism - an art technique that has been mesmerizing spectators for years with its meticulous attention to detail.
In this comprehensive tutorial, I'll be discussing all you need to know about photorealistic painting. No matter if you're a novice or a seasoned artist, this guide should help you master this demanding skill.
Unraveling Photorealism and Its Significance
Photorealism emerged as a powerful style in the art world during the late 60s. Artists such as Chuck Close and Richard Estes stretched painting to its limits, creating artwork so incredibly detailed it was often mistaken for photographs.
Though the technique of photorealism centres around recreating images from photos, it isn’t entirely about imitation. It is about delving deeply into understanding light, shadow, and texture. Today's artists experiment with photorealism to investigate notions of reality and perception.
The approach is continuously evolving, with modern digital tools supplementing traditional techniques, thus expanding opportunities and possibilities for artists worldwide.
Must-have Materials for Photorealistic Painting
Your final artwork heavily depends on the quality of the materials you choose to work with. Here's a rundown of all the essentials required to embark on your photorealistic painting journey:
Canvas and Surfaces: - Opt for superior-quality canvas boards or stretched canvases. - Choose smooth surfaces for fine details. - You could possibly try wood panels for super-smoothness.
Selection of Paint: - Select professional-grade acrylic or oil paints. - Aim for a broad spectrum of colours for subtle blending. - High concentration pigment paints prove to be longer-lasting.
Distinguishing Brushes: - Use small detail brushes (sizes ranging from 000 to 2). - Flat brushes should be used for area filling. - Soft synthetic brushes help avoid streaks.
Additional Tools: - Use high-resolution reference photos. - Have a magnifying glass ready for extreme detailing. - A colour mixing palette is a must. - Don’t forget to keep clean rags and solvents handy.
Crafting Your Prime Workspace
Your workspace directly impacts your work. Adequate illumination can prevent colour misinterpretation and tiredness in the eyes.
Choose a setting close to a north-facing window, if possible. The natural light offers the most accurate colour perception. If you must paint at night, substitute natural light with full-spectrum LED lights.
Ensure that your reference photo is positioned at eye level. This helps to avoid neck strain during lengthy painting durations and is convenient for quick comparisons with your canvas.
Maintaining an organized workplace saves time and aids focus. Make sure commonly used brushes are easily accessible. Use clean water containers to avoid colour contamination.
Selecting and Preparing Reference Photos
A suitable reference photo is crucial to the success of your photorealistic painting. High resolution is key to capturing precise details.
Choose photos with interesting lighting setups. High contrasts can result in dramatic effects. Initially, try avoiding photos with intricate patterns.
Think over the composition. The viewer’s eye should naturally navigate through the image. Leading lines and focal points add visual interest.
Edit your photo, if required. Altering contrast and brightness can highlight key areas. Make sure to print a top-quality version for referencing.
Step-by-Step Photorealistic Painting Procedure
Step 1: Initiate with a Sketch
Start off with a simple pencil sketch on your canvas. Initially, concentrate on getting the major shapes and proportions right, leaving the details for later.
Utilize a grid method for achieving accuracy if necessary. Split both your reference and canvas into equal squares, aiding you in maintaining accurate proportions.
Keep your primary lines faint. Heavier pencil strokes could show through the paint layers. Important lines can always be darkened later.
Step 2: Filling in Base Colours
Begin with the larger colour areas. Make sure the colours match your reference photo, without worrying about exact matches initially.
With acrylics, move from darker to lighter shades. This prevents lighter colours from being contaminated. If you’re using oils, either way could work.
Cover the entire canvas before focusing on the details. This ensures that the overall colour harmony is established right at the start of the process.
Step 3: Layering and Adding Details
Creating photorealistic art requires patience and multiple layers of paint. Every layer should be completely dry before the next is applied to avoid undesired colour mixing.
Start detailing the picture gradually. Shift from vague to specific forms. Leave the finest details until the end.
Use smaller brushes for accurate work and remember to take frequent breaks to refresh your perspective and avoid fatigue. Returning to the canvas with a fresh pair of eyes can often help identify errors.
Step 4: Final Touches and Highlights
The finishing touches bring life to your painting. The brightest highlights need to be carefully added to create the illusion of reality.
Reflective surfaces such as water, glass, and metal need extra attention. Examine how light behaves, bounces, and reflects.
Regularly step back to assess your progress. Sometimes, less detail results in better outcomes than trying to overwork one area.
Sophisticated Techniques for Brilliant Realism
Well accomplished artists have a few tricks up their sleeves to create striking photorealism. Glazing is one such technique that leads to bright, transparent effects. The method involves applying thin layers of transparent paint over dried layers.
Scumbling is another technique used to add texture and create atmospheric effects. Just lightly drag dry paint over textured areas - it works particularly well on clouds and fabrics.
Also, consider optical mixing for generating vibrant colours without physically blending them. This requires placing tiny dots of pure colour beside each other, allowing them to naturally blend in the observer's eye.
Commonly Made Mistakes and How to Avoid Them
While mastering the art of photorealism, it is not uncommon to make mistakes. Accelerating the process can lead to a lack of detail and errors. The key is to be patient and observe carefully.
Overworking an area can ruin the realistic impression of a painting. It's important to know when to stop detailing. Sometimes, implying a feature is more effective than clearly defining it.
Overlooking the colour temperature could result in loss of mood in a painting. Warm and cool colours lend depth and atmosphere, so pay attention to the temperature changes in your subject.
Misjudging value relationships can make your artwork appear flat. Squint at your reference to identify major light and dark areas. Be accurate in matching these relationships.
Digital Tools That Complement Your Process
Modern technology provides handy tools that can aid photorealistic painters. Photo editing software can help fine-tune reference images by adjusting levels and contrast for improved clarity.
Digital colour pickers ensure genuine colour accuracy as they sample the exact tone from your reference photos. Many such tools can be found as apps to use directly on your smartphone.
Online communities can provide constructive criticism along with inspiration. Share your work-in-progress to accelerate your growth through collective learning.
Consistency Is the Key to Skill Development
Consistent work surpasses intense and irregular spurts in skill development. Try to practice every day, even if for little durations. Daily repetition helps build muscle memory and enhances observational skills.
Start off with uncomplicated subjects before moving to complex scenes. Begin with mastering simple forms like spheres and cubes as these skills can later be applied to more elaborate subjects.
Visit museums and galleries for inspiration and scrutiny. This close observation of techniques and brushwork can help substantially. Additionally, several museums offer permission to take photographs for reference purposes.
Pushing the Boundaries of Your Photorealistic Art
After grasping the basic techniques, challenge yourself with more complex subjects, like portraits. Rendering human faces demand excellent skills and an exceptional level of patience as every little detail counts.
Experiment with varying scales of your artwork. Larger paintings allow for a stunning amount of detail while smaller pieces demand proficient techniques and detailed planning.
Combine photorealism with other styles to create a distinctive artistic expression. Many contemporary artists successfully amalgamate multiple approaches.
Conclusion: Embarking on Your Photorealistic Painting Journey
The journey to mastering photorealism is filled with learning and improvements. The skills acquired during the journey will enhance every aspect of your painting capabilities. Patience, regular practice, and acute observation are your most valuable assets.
Remember, photorealism is not about precisely duplicating a photograph. It's about comprehending reality profoundly enough to convincingly recreate it on your canvas. Each painting you create imparts invaluable lessons about light, form, and colour.
Kickstart your journey of photorealistic painting today. Choose a simple subject and begin practising the techniques. With commitment and regular practice, you will soon be creating paintings that leave spectators in awe with their striking realism.
Remember, the path to mastering photorealism is a marathon, not a sprint. The rewards of your efforts will be amazing artworks that captivate viewers' hearts and minds. All the best with your painting endeavours!