Easy Rainbow Sponge Painting: Beginner Color Blending Guide
Beginner’s Guide to Effortless Rainbow Sponge Painting and Color Blending
Have you ever dreamed of creating vibrant rainbow artwork but felt discouraged by technically challenging painting techniques? There's good news! Rainbow sponge painting is an extremely fun, user-friendly method of experimenting with color blending. With no prior painting experience, you too can master this technique in just one afternoon.
In my first attempt at rainbow sponge painting, I had apprehensions about color mixing and messing it up. Yet in just a few minutes, I was amazed by the harmonious merging of colors. The sponge does most of the heavy lifting for you!
The Magic behind Rainbow Sponge Painting
Rainbow sponge painting is unique from other art techniques. The sponge introduces a distinctive texture that's hard to replicate with brushes. Colors flow into one another without any harsh transitions. Additionally, the method is extremely forgiving — the outcome always looks intentional and striking.
This method can be used by both children and adults. Children enjoy the tactile involvement of applying paint. While adults find the process meditative and love the stunning outcomes.
Rainbow Sponge Painting: Key materials you'll need
Initiating your Rainbow Sponge painting adventure requires basic supplies, most of which you may already have at home.
Selecting Paints
Opt for acrylic paints in basic rainbow colors: red, orange, yellow, green, blue, and purple. Craft store paints are perfectly suitable for beginners. High-end artist-grade paints are not needed for impressive results.
Choice of Sponges
Natural sea sponges produce fascinating textures. If not, kitchen sponges can be used.
Paper and Canvas
Opt for heavy paper or canvas boards that can handle wet paint effectively. Regular copier paper is not ideal as it tends to wrinkle when wet, so it's best to avoid it for optimum results.
Additional Tools
Paper plates for your paint palette, water containers to clean sponges, and paper towels to mop up excess paint come in handy.
Setting Up Your Rainbow Sponge Painting Workspace
Select a well-lit, ventilated spot for your painting leisure. Cover the workspace with newspapers or plastic sheets.
Arrange your paints in the rainbow sequence on a paper plate for easy access while painting. Keep each sponge separate to prevent color confusion.
Prepare two water containers. One for cleaning and the other for fresh water. This helps keep your colors vibrant and free from mudding.
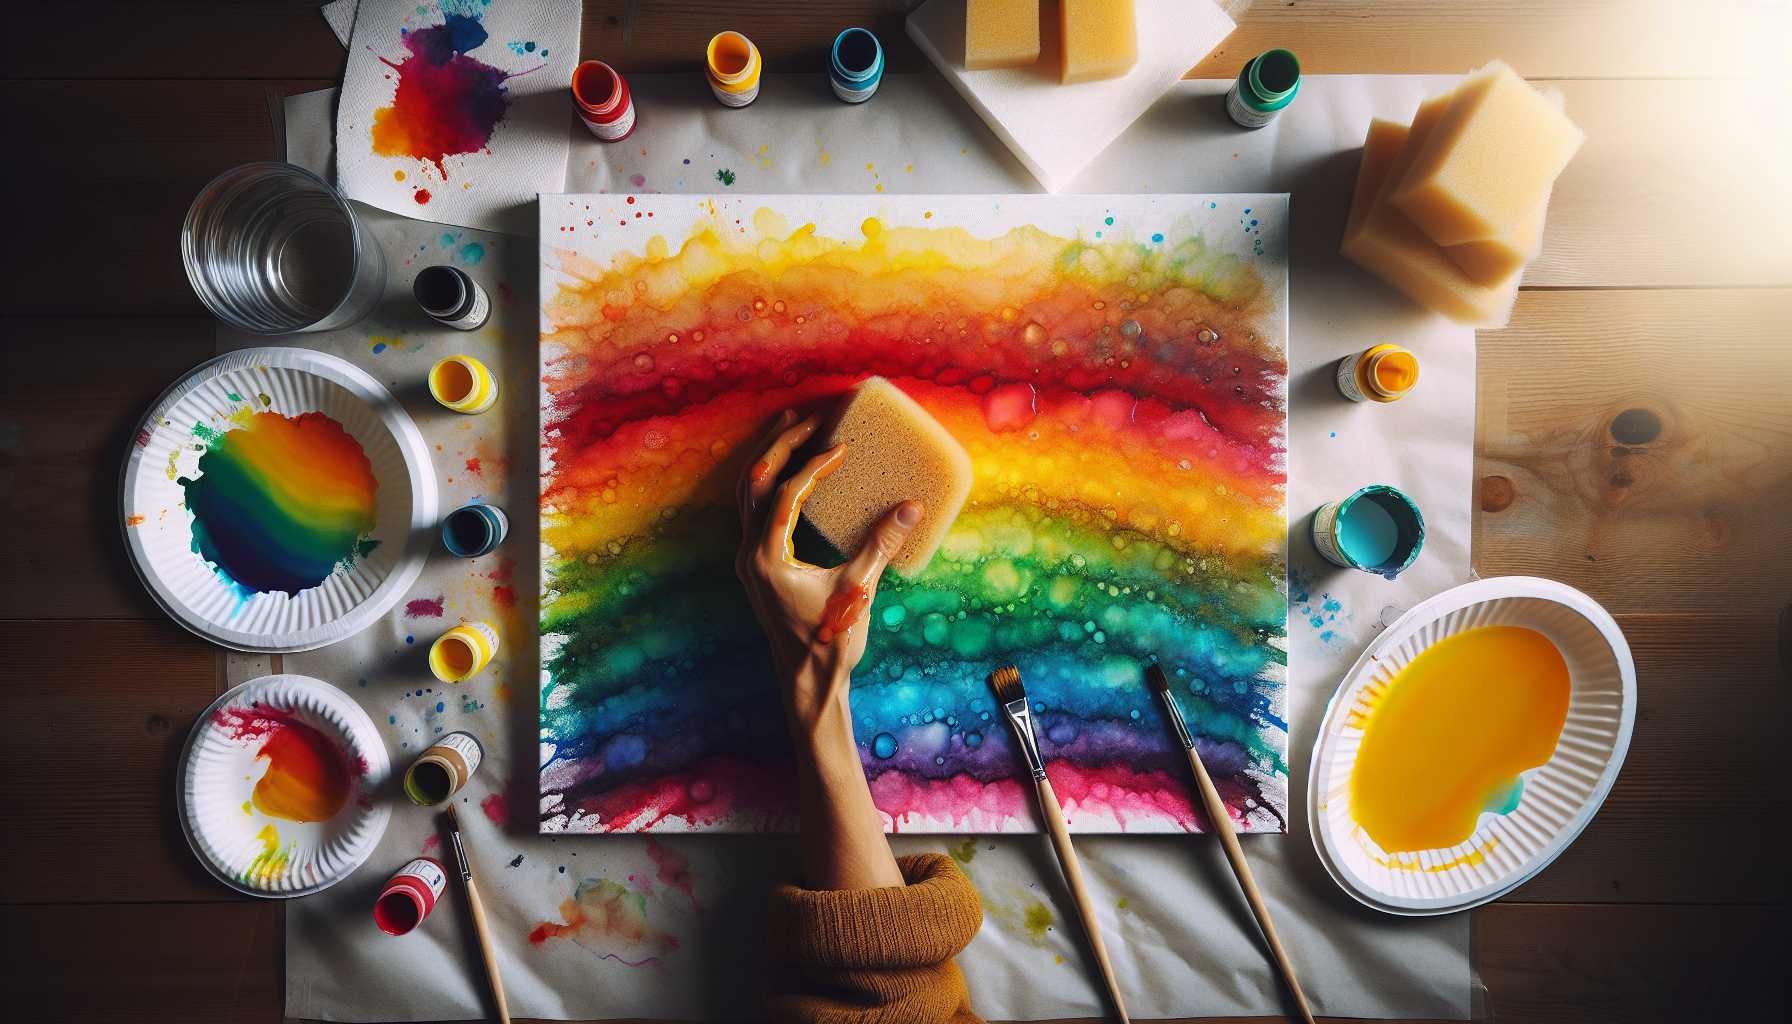
A Simple Guide to Rainbow Sponge Painting Technique
Get ready for the exciting part! Follow these easy steps to create your first rainbow sponge painting masterpiece.
Initiating with Your First Color
Start with the color red at the top of your canvas. Dab the sponge slightly in the paint. Avoid over-saturation. Gently press and lift the sponge across your canvas. Vary the pressure to create different textures.
Incorporating the Second Color
Move down to the color orange. Clean your sponge lightly, leaving some red behind. This promotes color mixing. Apply the orange slightly above the red area. Witness the natural blending of colors.
Continuing with the Rainbow Sequence
Similarly, proceed with yellow, green, blue, and purple. Each color should blend slightly with the previous one, creating lovely secondary colors.
Blending Techniques
For smoother transitions, blend overlapping colors with a clean, damp sponge. Work while the paint is still wet. Avoid over-blending to keep it looking natural.
Useful Color Blending Tips for Rainbow Sponge Painting
Knowing basic color theory will add finesse to your rainbow sponge painting. For instance, mixing red and yellow will give you orange. Yellow and blue will make green. These color relationships are quite advantageous for you.
Handling Paint Consistency
Maintain your paints a little damp but not too watery. Dry paints will not blend effectively, while very wet ones may lead to a muddy outcome.
Crafting Smooth Transitions
Smooth gradients are achieved by gently overlapping colors. Use a soft dap motion to create the best blending effects.
Preventing Muddy Colors
Ensure to clean your sponge when moving from contrasting colors. A direct transition from yellow to purple sans cleaning can result in an undesired brown mix instead of a beautiful blend.
Fostering Creativity with Rainbow Sponge Painting
Once you've gotten the hang of introductory techniques, put your creativity to use. Rainbow sponge painting is suitable for a myriad of projects.
Background Techniques
Craft stunning backdrops for other artwork or a radiant rainbow sky for landscapes. The possibilities are endless.
Abstract Designs
Let your creativity flow with abstract rainbow patterns. Create mandala-like patterns with circular strokes.
Seasonal Variations
Adapt your color palette as per the season. Use warm tones for autumn and cool blues for a winter effect.
Troubleshooting Rainbow Sponge Painting
Occasional challenges are quite common for beginners. Here's a cheat sheet to solve those minor issues.
Muddy Colors
Muddy colors usually result from over mixing or unclean sponges. Start with fresh sponges and new paint. Avoid over-blending.
Handling Paint Drips
Too much paint will lead to unwanted drips. Soak up the excess paint on a paper towel before applying it to the canvas. If drips still appear, quickly blend them into the design.
Uneven Color Distribution
Sometimes, you may end up with lighter or darker areas. Add more paint to lighten the area with a gentle dabbing motion. Blend overly dark spots with a clean, damp sponge.
Advanced Techniques to Boost Your Rainbow Sponge Painting
Once you've got a knack for the basics, try these sophisticated techniques to add depth to your artwork.
Layering Colors
Adding numerous thin layers adds depth to your painting. Let each layer dry partially before you layer on the next one.
Adding White Highlights
Strategically placed white highlights can make colors stand out. Use a smaller sponge to add white clouds to blue areas.
Integrating Other Tools
Experiment with combining sponge painting with other techniques. Add details with brushes after the sponge work dries.
Tips for Maintaining Your Rainbow Sponge Painting Materials
Taking care of your supplies will not only extend their life but also save you money.
Cleaning Sponges
Rinse the sponges well after each use. Squeeze gently to remove paint without damaging the sponge.
Storing Paint
Store paints in cool, dry places away from direct sunlight. Keep them sealed tightly to prevent drying. If the paint has already dried, add a few drops of water to revive it.
Brush Maintenance
Although most work is done with sponges, you might use brushes for details. After use, clean them promptly and reshape the bristles while damp for better performance.
Showcasing and Preserving your Rainbow Sponge Paintings
Your beautiful rainbow sponge paintings deserve proper display and care.
Drying Your Artwork
Let your paintings dry out thoroughly before touching them. Although acrylic paintings usually dry within a few hours, the drying period can be influenced by humidity.
Framing Options
Simple frames complement rainbow paintings beautifully. White or black frames pair well with the colorful artwork. Consider using mounts for a more professional appearance.
Long-term Preservation
Keep completed paintings away from direct sunlight to avoid fading. Store unframed pieces flat with tissue paper in between.
Conclusion: The Start of Your Rainbow Sponge Painting Journey Begins
Rainbow sponge painting opens doors to millions of creative opportunities. With some simple supplies and basic techniques, you can create beautiful artwork.
Remember, in rainbow sponge painting, there are no mistakes - only happy accidents that lend charm to your work. Every painting session builds your confidence and skills.
Start with uncomplicated rainbow strips to get the hang of color blending, and then as your comfort level grows, venture into more complex designs. Most importantly, enjoy the journey.
Your rainbow sponge painting adventure is about to begin. Arrange your supplies, prepare your workspace, and unleash your creativity. You might surprise yourself with the outcomes.