Easy Gradient Painting: Simple Color Blending Guide
User-Friendly Guide to Simple Gradient Painting: Master Color Blending
Have you found yourself entranced by captivating sunset paintings which see colors transition so subtly, they seem to merge into one another? If you too have dreamt of creating these mesmerizing gradients, your journey begins now!
Despite gradient painting seeming like an intimidating feat, I assure you, it's simpler than it appears. With the right methods and some practice, you'll master the art of blending colors before you know it.
Gradient Painting Decoded
Gradient painting revolves around creating smooth transitions in color. It refers to the gradual transformation of one color into another. Visualize a sunset where the fiery orange takes on a soft pink hue or a blue sky that dissolves into white as it meets the horizon.
Incorporating this technique into your artwork adds depth and creates a specific mood or atmosphere. Moreover, it gives your paintings a profoundly professional aesthetic.
s to Easy Gradient Painting
Embarking on your journey with gradient painting does not necessitate specialized equipment. This is what you'll need:
- Acrylic or watercolor paint
- Canvas or watercolor paper
- Flat brushes of at least two different sizes
- Containers filled with clean water
- Paper towels
- Palette for mixing colors
As you start out, simplicity is key. You can always choose to upgrade your supplies later on.
Basics of Color Theory
Before we delve into techniques, it's crucial to understand the dynamics of colors. Knowing how to harmonize colors will make gradient painting significantly easier.
Primary colors comprise red, blue, and yellow. These cannot be derived from other colors.
Secondary colors are obtained by mixing primary colors. Orange, green, and purple fall into this category.
Analogous colors are found side by side on the color wheel. They blend together with almost unnoticeable transitions. Think along the lines of blue to green or red to orange transitions.
Start off with analogous colors for your initial gradients. They are the most forgiving!
The Wet-on-Wet Technique
A personal favorite for beginners is the wet-on-wet technique. It yields the most seamless blends.
Here is how to master it:
- Prep your surface. Slightly dampen it with clean water.
- Apply the first color while the surface is still wet.
- Quickly introduce the second color next to the first.
- Gently blend at the meeting point of the colors using horizontal strokes.
- Act swiftly! You have a window of approximately 10-15 minutes before the paint begins to dry.
The wet surface enables natural merging of the colors. It's practically enchanting!
Conquering the Dry Brush Blend
There may be times you seek greater control over your gradient, and this is where the dry brush blending comes in handy.
This method pairs remarkably well with acrylics:
- Paint the first color and allow it to dry fully.
- Load your brush with the second color.
- Eliminate extra paint on a paper towel.
- Gently brush over the edge of your first color.
- Employ light, feathery strokes to achieve the blend.
This method isn't a race, take your time and build the gradient incrementally.
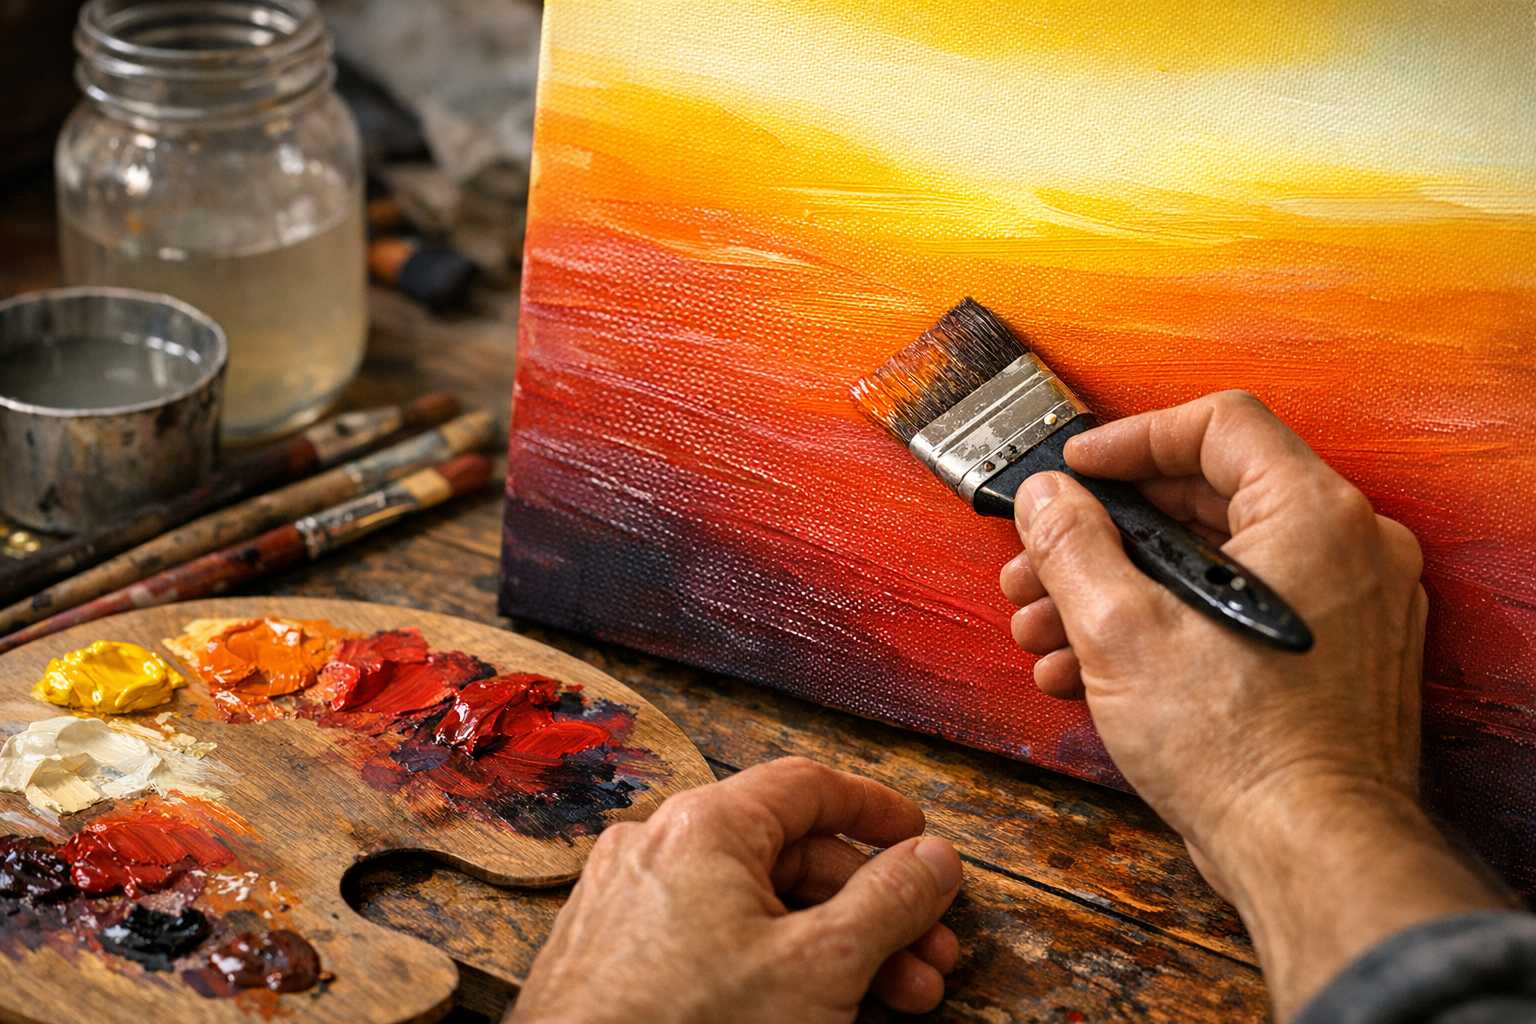
A Stepwise Guide to Painting a Sunset Gradient
Now, let's transition from theory to practice! Let's craft a simple sunset gradient.
Required colors: Yellow, orange, and red
Step 1: Moisten your canvas lightly with clean water.
Step 2: Begin by applying yellow at the bottom third of your canvas.
Step 3: Introduce orange in the mid-section of the canvas, while the yellow coat is still wet.
Step 4: Add red to the upper section.
Step 5: Blend at the meeting points of the colors using horizontal brush strokes.
Step 6: Maintain a brisk pace and avoid excessively manipulating the paint.
Voilà! You've crafted your very first sunset gradient.
Diving into Ocean Wave Color Blending
Ocean gradients serve as the perfect stage for honing your skills in blending cool colors.
Required colors: White, light blue, and dark blue
Process: starting with white where waves froth, gradually introduce light blue, which then deepens into dark blue. Utilize vertical strokes to replicate the movement of water.
Water scenes are particularly forgiving. The natural variation can enhance realism!
Common Pitfalls and How to Dodge Them
Even seasoned painters can stray into these traps. Here's how to avoid them:
Over-manipulating the paint needs to be avoided, as it can yield muddy colors. Learn to discern when you've blended enough.
Excessive water usage can result in drips and runs, be mindful of this.
Opting for clashing colors can make blending a nightmare. Stick to compatible color combinations.
Rushing through the process can leave gradients uneven. Take your time, especially when learning.
Failing to clean brushes between different colors can lead to unintentional color mixing.
Secrets to Achieving Smooth Color Transitions
Are you ready to elevate your gradients? Heed these expert tips:
Employ a spray bottle to extend the duration of your work surface remaining slightly damp.
Blend in a single direction for the smoothest transitions.
Initiate with light colors and gradually add darker ones. This is easier than the reverse procedure
Practice on scrap pieces before moving to your final canvas.
Keep a damp brush on standby to soften any harsh lines.
Digital Vs. Traditional Gradient Painting
Both mediums have their merits in the realm of art! Traditional painting offers: - A unique texture and character - Serendipitous ‘mistakes’ that contribute to interesting effects - The satisfaction derived from working with tangible materials
On the other hand, digital tools provide: - The convenience of easy fixes and modifications - An infinite array of color options - Quick experimentation
I recommend experimenting with both mediums if you can. Each presents worthwhile learning opportunities!
Honing Your Gradient Skills
As with any skill, practice is the path to perfection. Here are a few fun exercises:
Daily color strips: Each day, paint straightforward gradients between two colors.
Sky studies: Paint the sky as it appears at varying times of the day.
Fruit practice: Fruits like apples and oranges flaunt natural gradients and make for great practice.
Abstract experiments: Unleash your creativity and play with unexpected color duos.
Don't obsess over achieving perfection. Concentrate on understanding how colors interact.
Finding Solutions to Common Problems
Arduous lines cropping up? Your paint may be drying too rapidly. Try accelerating your pace or incorporating a slow-drying medium.
Colors becoming muddy? Overmixing could be the culprit. Use fewer brush strokes and let colors meld naturally.
Coverage uneven? Your brush technique could be off. Consistent pressure is key in creating even gradients.
Paint drying too soon? Work with smaller sections, or include a retarding medium to decelerate drying time.
Advancing Your Gradients
Ready to level up? Experiment with these advanced techniques:
Multiple color gradients that use three or more colors Radial gradients radiating from a central point Textured gradients created with sponges or palette knives Layered gradients crafted by building multiple translucent layers
Each technique opens new doorways to creativity!
Epilogue
Gradient painting has the ability to elevate standard artwork to extraordinary heights. It's an art form that requires practice and patience to master.
Keep in mind, even the artists hailed as masters were once novices. Those effortlessly smooth, professional-looking gradients you admire? They are the fruits of practice and experimentation.
Initiate with uncomplicated two-color blends. Master the basics before progressing to complex techniques. Above all, enjoy the process!
Your distinct artistic style will naturally evolve with practice. Before long, you'll be creating gradients that are uniquely yours.
So, pick up your brushes and paints. The journey to mastering gradient painting awaits you. Believe me, the moment you witness your first smooth color transition, you'll be hooked!
Happy painting!